Easy Protein Brownie Bites-Healthy Treat
Protein Brownie Bites are about to revolutionize your snack game! Forget those chalky, disappointing protein snacks of the past. We’re talking about rich, fudgy, intensely chocolatey bites that happen to be packed with a protein punch. If you’ve ever found yourself craving something decadent but also wanting to fuel your body with goodness, then these are for you. The magic of these Protein Brownie Bites lies in their ability to satisfy that deep chocolate desire without the guilt. They’re incredibly easy to whip up, making them perfect for busy weekdays or post-workout rewards. What makes them truly special is the incredible texture and flavor profile; you’d never guess they’re loaded with wholesome ingredients. Get ready to fall in love with a healthier way to indulge!
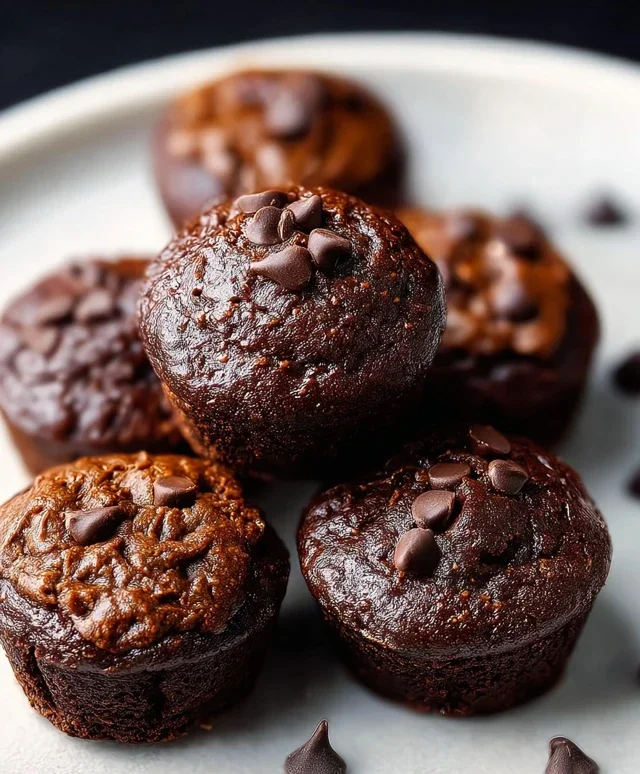
Protein Brownie Bites
Are you craving a decadent chocolate treat but also trying to stick to your fitness goals? Look no further! These Protein Brownie Bites are your answer. They’re incredibly easy to make, require no baking (which means no waiting around for them to cool!), and are packed with protein to keep you satisfied and energized. The natural sweetness of the bananas cuts down on the need for added sugars, making these a healthier alternative to traditional brownies. They’re perfect for a pre- or post-workout snack, a guilt-free dessert, or even a little afternoon pick-me-up. The texture is fudgy and rich, just like a classic brownie, but with the added bonus of being incredibly good for you.
These bites are so versatile too. You can customize them by adding a sprinkle of sea salt on top for a sweet and salty combination, or even stirring in some chopped nuts for extra crunch and healthy fats. The beauty of making your own treats is that you control the ingredients, and these Protein Brownie Bites are a testament to that. They’re naturally gluten-free and can easily be made dairy-free by choosing a plant-based protein powder. Let’s get started on creating these delicious and healthy bites!
Ingredients:
Let’s Make Some Magic
Now that we have all our ingredients ready, it’s time to bring them together. The process is incredibly straightforward, making it a perfect recipe for even the busiest of schedules or for begin extractners in the kitchen. The key to success here is ensuring your bananas are truly ripe. The browner and spottier they are, the sweeter they will be, which means less need for any added sweeteners. This also contributes to a wonderfully soft and moist texture in our brownie bites.
Step 1: Prepare the Bananas
The first step is to get our bananas ready. Take your three very ripe bananas and peel them. Place them in a medium-sized mixing bowl. Using a fork, thoroughly mash the bananas until they are as smooth as possible. You want to break down any large lumps to ensure a consistent texture in your brownie bites. Don’t worry if there are a few tiny specks of banana left; this will only add to the rustic charm of your treat. The mashing process releases the natural sweetness and moisture from the bananas, which will act as the binder and base for our brownie bites.
Step 2: Combine Wet Ingredients
Once your bananas are mashed to your liking, it’s time to add the peanut butter or almond butter. Measure out ½ cup of your chosen nut butter and add it directly into the bowl with the mashed bananas. Now, grab a sturdy spoon or a spatula and mix the nut butter into the mashed bananas until it’s well combined. You’re aiming for a smooth, uniform paste. This step is crucial for creating a rich, fudgy base for our brownie bites. The healthy fats from the nut butter will also contribute to the satisfying texture and help to bind everything together. If your nut butter is very stiff, you might want to warm it slightly for a few seconds in the microwave before adding it; this will make it easier to mix.
Step 3: Incorporate the Dry Ingredients
Now it’s time to add the star players that will transform our banana-nut butter mixture into brownie bites: the protein powder and cocoa powder. Measure out ½ cup of your vanilla or chocolate protein powder. If you’re using chocolate protein powder, this will intensify the chocolate flavor, while vanilla will offer a more subtle hint of sweetness and flavor. Next, add ¼ cup of unsweetened cocoa powder. Again, using a good quality cocoa powder will make a difference in the depth of flavor. Add both of these dry ingredients to the bowl.
Step 4: Mix Until a Dough Forms
This is where the magic really happens. Stir all the ingredients together with your spoon or spatula. You’ll need to put in a little bit of effort here, as the mixture will start to thicken significantly. Continue to mix and fold the ingredients until a thick, brownie-like dough begin extracts to form. It should be cohesive and pull away from the sides of the bowl. Make sure you scrape the sides and bottom of the bowl to incorporate all the dry ingredients. If the mixture seems a little too dry and crum extractbly, you can add a tiny splash of milk (dairy or non-dairy) or a little more nut butter, about a teaspoon at a time, until it reaches the desired consistency. Conversely, if it seems too wet, you can add a touch more protein powder or cocoa powder.
Step 5: Shape and Decorate Your Bites
Once you have a nice, thick dough, it’s time to shape your brownie bites. You can use a small cookie scoop or your hands to roll the dough into small, bite-sized balls, about 1 inch in diameter. Place these balls onto a plate or a parchment-lined baking sheet. If you’re feeling fancy and want to add some extra chocolatey goodness, this is the time to sprinkle a few mini chocolate chips on top of each bite. Gently press them into the dough so they stick. You can also use a fork to lightly score the tops of the bites, creating a classic brownie look.
Chill Time
Now that your brownie bites are shaped and looking delicious, they need a little time to firm up. This step is essential for achieving the perfect fudgy texture. Place the plate or baking sheet with your brownie bites into the refrigerator for at least 30 minutes. This chilling period allows the ingredients to meld together and the bites to become firm enough to handle easily. The longer they chill, the firmer they will become. Once they are firm to the touch, your Protein Brownie Bites are ready to be enjoyed! You can store them in an airtight container in the refrigerator for up to a week. Enjoy this healthy and satisfying treat!
Conclusion:
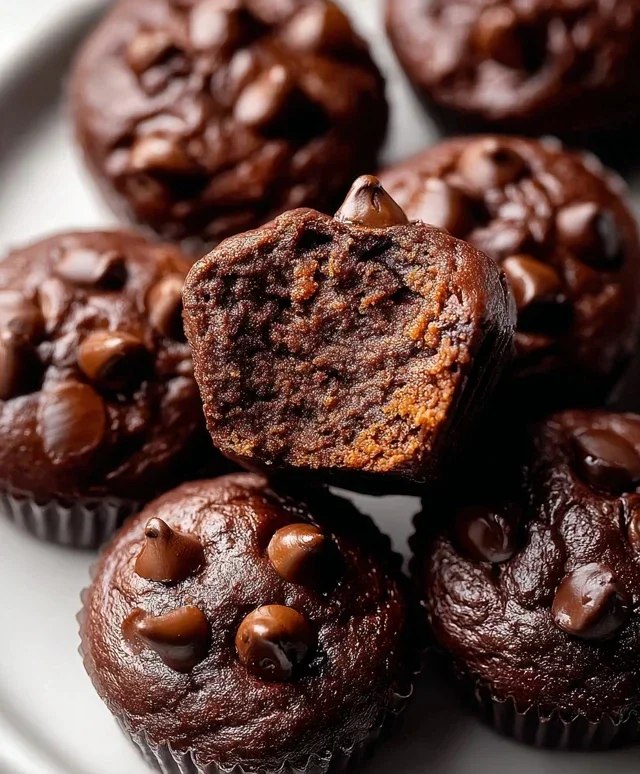
I hope you’re as excited about these Protein Brownie Bites as I am! These little powerhouses are a fantastic way to satisfy your chocolate cravings while giving your body a beneficial boost of protein. They’re incredibly versatile, making them the perfect guilt-free treat for any time of day. Whether you need a post-workout reward, a midday energy pick-me-up, or a healthier option for your sweet tooth, these bites deliver. Their chewy texture and rich chocolate flavor are sure to impress, even those who aren’t strictly focused on protein intake.
Feel free to enjoy them on their own, or get creative with serving! They are delicious crum extractbled over yogurt or ice cream, or even used as a base for mini cheesecakes. Don’t be afraid to experiment with variations – add in some chopped nuts for extra crunch, a swirl of nut butter, or even some extra chocolate chips for an even more decadent experience. I truly encourage you to give this recipe a try; I know you’ll love how easy it is to whip up and how satisfying these Protein Brownie Bites are!
Frequently Asked Questions:
Can I make these vegan?
Absolutely! To make these vegan, simply substitute the eggs with a flax egg (1 tablespoon ground flaxseed mixed with 3 tablespoons water, let sit for 5 minutes) and ensure you use a plant-based protein powder. For dairy, use dairy-free milk and chocolate chips.
How should I store these Protein Brownie Bites?
Store your Protein Brownie Bites in an airtight container at room temperature for up to 3 days, or in the refrigerator for up to a week. They also freeze beautifully for longer storage!
What if I don’t have protein powder?
While protein powder is the star of this recipe, you could experiment with replacing a portion of the flour with a nut flour like almond or oat flour, but be aware this will alter the texture and protein content significantly. For the best results and intended protein boost, using protein powder is recommended.
Protein Brownie Bites
Delicious and easy protein brownie bites made with simple, wholesome ingredients.
Ingredients
-
3 very ripe bananas
-
½ cup smooth peanut butter
-
1/2 cup vanilla protein powder
-
1/4 cup unsweetened cocoa powder
-
Sprinkle of mini chocolate chips
Instructions
-
Step 1
Preheat oven to 350°F (175°C) and lightly grease a mini muffin tin. -
Step 2
In a medium bowl, mash the very ripe bananas until smooth. -
Step 3
Add the smooth peanut butter, vanilla protein powder, and unsweetened cocoa powder to the mashed bananas. Stir until well combined and a thick batter forms. -
Step 4
Gently fold in the sprinkle of mini chocolate chips, if using. -
Step 5
Spoon the batter into the prepared mini muffin tin, filling each cup about two-thirds full. -
Step 6
Bake for 15-20 minutes, or until a toothpick inserted into the center comes out clean. -
Step 7
Let the brownie bites cool in the tin for a few minutes before transferring them to a wire rack to cool completely.
Important Information
Nutrition Facts (Per Serving)
It is important to consider this information as approximate and not to use it as definitive health advice.
Allergy Information
Please check ingredients for potential allergens and consult a health professional if in doubt.