Spicy Kani Crab Sushi Roll Recipe – Easy & Delicious
Kani sushi, also known as the spicy crab roll, is an absolute showstopper in the world of sushi. Have you ever found yourself craving that perfect balance of creamy, spicy, and savory that only a well-made spicy crab roll can deliver? I certainly have! It’s no wonder this particular roll has captured the hearts (and taste buds) of so many sushi enthusiasts worldwide. What makes kani sushi so undeniably popular? It’s the delightful fusion of textures and flavors: tender imitation crab meat, tossed in a zesty, creamy sriracha-mayonnaise dressing, all nestled within perfectly seasoned sushi rice and crisp nori. This isn’t just another sushi roll; it’s an experience. The gentle heat builds with each bite, creating a satisfying kick that keeps you reaching for more. Forget complicated techniques; making an authentic and delicious kani sushi at home is surprisingly accessible, and I’m thrilled to guide you through it.
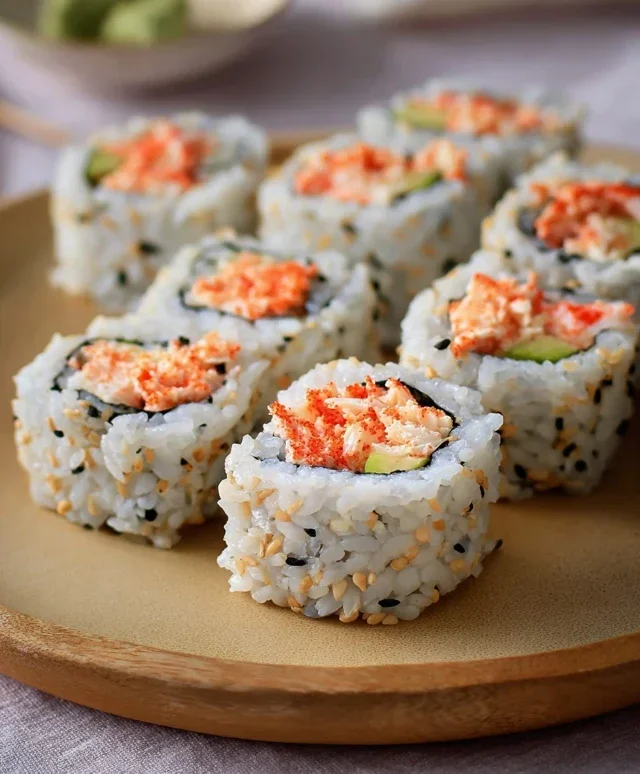
Kani Sushi (Spicy Crab Roll)
There’s something incredibly satisfying about a perfectly crafted spicy crab roll. The creamy, spicy kick of the crab mixture, the fresh crunch of the vegetables, all wrapped up in seasoned sushi rice and crisp nori – it’s a flavor explosion that’s surprisingly achievable in your own kitchen. Forget expensive takeout; let’s dive into making this popular sushi roll at home. This recipe will guide you through each step, ensuring a delicious and impressive result.
Ingredients:
Cooking Instructions:
The journey to delicious Kani Sushi begin extracts with preparing the foundation: perfect sushi rice. This is a crucial step, as the texture and flavor of your rice will elevate the entire roll.
1. Cooking the Sushi Rice
Begin extract by thoroughly rinsing the sushi rice. Place the 1 1/2 cups of uncooked short-grain sushi rice in a fine-mesh sieve and rinse it under cold running water. Continue rinsing and gently agitating the rice with your hands until the water runs clear. This removes excess starch, preventing the rice from becoming gummy. Once rinsed, drain the rice well and transfer it to a medium saucepan. Add the 2 cups of water to the saucepan. Cover the saucepan tightly with a lid and bring it to a boil over medium-high heat. Once boiling, reduce the heat to low and simmer for 15-20 minutes, or until all the water has been absorbed. Resist the urge to lift the lid during this time; it’s important to let the steam do its work. After the simmering time, remove the saucepan from the heat and let it sit, still covered, for another 10 minutes. This steaming process allows the rice to finish cooking evenly and achieve that perfect slightly chewy texture.
2. Preparing the Sushi Vinegar
While the rice is steaming, let’s prepare the seasoned rice vinegar. In a small bowl, whisk together the 3 tablespoons of unseasoned rice vinegar, 1 tablespoon of granulated sugar, and 1 teaspoon of salt. Stir until the sugar and salt are completely dissolved. This simple mixture is what gives sushi rice its signature tangy-sweet flavor and helps it bind together.
3. Seasoning the Sushi Rice
Once the rice has rested for 10 minutes, transfer it to a large, non-metallic bowl. A wooden or glass bowl is ideal, as metal can react with the vinegar. Gently pour the prepared sushi vinegar mixture over the hot rice. Using a rice paddle or a flat spatula, gently fold the vinegar into the rice using a cutting and folding motion. Avoid stirring or mashing the rice, as this will break the grains and make it mushy. Continue folding until the vinegar is evenly distributed and the rice has a glossy sheen. Fan the rice as you fold it to help it cool down more quickly and achieve a slightly drier, firmer texture. This cooling process is vital for making the rice easy to handle when rolling.
4. Making the Spicy Crab Mixture
In a separate medium bowl, prepare the star of our roll: the spicy crab mixture. Add the 9 thinly sliced sticks of imitation crab meat. I like to lightly shred the imitation crab meat with my fingers to break it down into smaller, more manageable pieces. This creates a better texture for the roll. Then, add the 1/4 cup of Kewpie mayonnaise (its rich, creamy texture is perfect for this), 1 tablespoon of sriracha for that essential kick, 1/2 teaspoon of lime juice for brightness, and a tiny 1/8 teaspoon of sesame oil for a subtle nutty aroma. Mix everything together gently until well combined. Taste and adjust the sriracha if you prefer it spicier or milder. The goal is a creamy, slightly fiery crab salad.
5. Assembling the Kani Sushi Rolls
Now for the fun part: rolling! Lay a half-sheet of nori, shiny side down, on a bamboo sushi rolling mat (makisu). If you don’t have a sushi mat, you can use a piece of plastic wrap. Wet your hands slightly with water (this prevents the rice from sticking) and spread a thin, even layer of the seasoned sushi rice over the nori, leaving about a 1/2-inch border at the top edge. Sprinkle some toasted sesame seeds (black and white) over the rice for added flavor and visual appeal.
Now, place a generous spoonful of the spicy crab mixture in a horizontal line across the rice, about one-third of the way up from the bottom edge. Place a few slices of avocado next to the crab mixture and then a few julienned Persian cucumbers. Don’t overfill the roll, or it will be difficult to close.
Starting from the bottom edge, use the bamboo mat to tightly roll up the nori, rice, and fillings. Lift the edge of the mat and tuck it over the filling, then continue rolling, applying gentle but firm pressure to create a compact roll. Use the border of nori at the top to seal the roll. You can moisten this border with a little water if needed.
6. Slicing and Serving
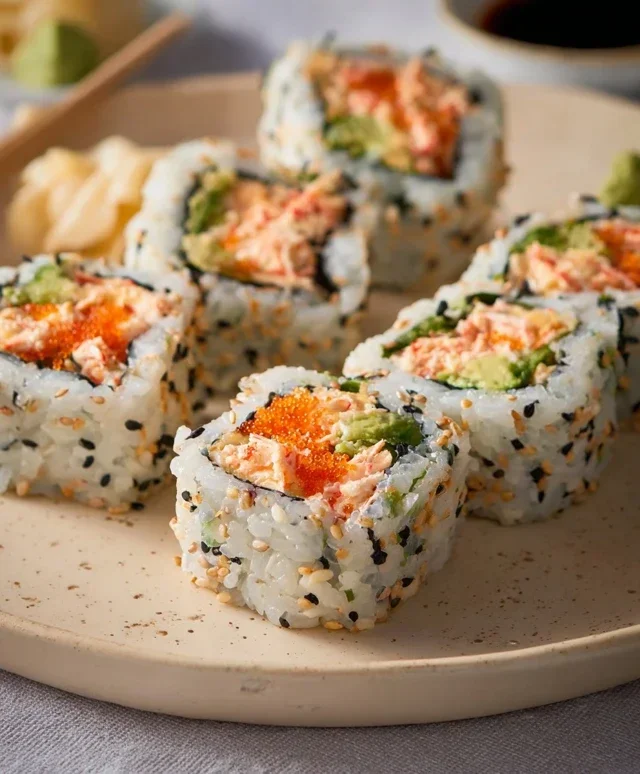
Once your rolls are formed, it’s time to slice them. Use a very sharp knife. It’s helpful to wipe the knife with a damp cloth between each cut to prevent sticking. Slice each roll into 6-8 pieces. Arrange the Kani Sushi pieces on a serving platter. Serve immediately with soy sauce for dipping, and perhaps some pickled gin extractger and wasabi if you like. Enjoy your homemade, delicious spicy crab rolls!
Conclusion:
There you have it – a foolproof guide to making delicious Kani Sushi (Spicy Crab Roll) right in your own kitchen! This recipe is fantastic because it offers a burst of flavor and satisfying texture that’s often found in your favorite sushi restaurants, but with the added benefit of customization and the satisfaction of a homemade meal. The creamy, slightly spicy crab mixture combined with the perfectly seasoned sushi rice is truly a winning combination that’s sure to impress. Don’t be intimidated; even if you’re new to sushi making, this recipe is designed to be accessible and enjoyable.
For serving, I love to pair my Kani Sushi with a side of pickled gin extractger, a dollop of wasabi, and plenty of soy sauce for dipping. Fresh cucumber slices or avocado also make wonderful accompaniments. If you’re feeling adventurous, consider experimenting with variations! You can add a touch of sriracha to the rice for an extra kick, incorporate finely chopped chives for a fresh oniony note, or even swap out the imitation crab for real cooked crab meat for an even more luxurious roll. I truly encourage you to give this Kani Sushi recipe a try. It’s a fun and rewarding culinary adventure that will have you creating restaurant-quality rolls in no time!
Frequently Asked Questions:
What kind of imitation crab should I use?
For the best results, look for “surimi” or “kani kama” in the seafood section of your grocery store. These are typically made from white fish and mimic the texture and flavor of real crab quite well. The quality can vary, so I recommend trying a couple of brands to find your favorite.
Can I make this ahead of time?
While you can prepare the spicy crab mixture and cook the sushi rice a few hours in advance, it’s best to assemble the rolls closer to serving time. The rice can become dry if left out too long, and the nori seaweed can soften and lose its crispness. However, for a party, you can assemble them about an hour before guests arrive and keep them loosely covered at room temperature.
Kani Sushi (Spicy Crab Roll)
A classic spicy crab roll featuring imitation crab, creamy Kewpie mayo, and fresh vegetables, rolled in nori and sushi rice.
Ingredients
-
1 1/2 short grain sushi rice (uncooked)
-
2 cups water
-
3 tablespoons unseasoned rice vinegar
-
1 tablespoon granulated sugar
-
1 teaspoon salt
-
9 sticks imitation crab meat (thinly sliced)
-
1/4 cup Kewpie mayonnaise
-
1 tablespoon sriracha
-
1/2 teaspoon lime juice
-
1/8 teaspoon sesame oil
-
1 avocado (thinly sliced)
-
2 persian cucumbers (julienned)
-
3 Nori Sheets (cut in half)
-
toasted sesame seeds (black and white)
Instructions
-
Step 1
Rinse sushi rice until water runs clear. Combine rice and water in a saucepan, bring to a boil, then reduce heat, cover, and simmer for 15 minutes. Let stand, covered, for 10 minutes. In a small bowl, whisk together rice vinegar, sugar, and salt until dissolved. Gently fold the vinegar mixture into the cooked rice. Allow to cool. -
Step 2
In a separate bowl, combine imitation crab meat, Kewpie mayonnaise, sriracha, lime juice, and sesame oil. Mix well to create the spicy crab filling. -
Step 3
Place a half sheet of nori, shiny side down, on a bamboo sushi mat. Moisten your hands with water and spread a thin, even layer of sushi rice over the nori, leaving about a 1/2-inch border at the top. -
Step 4
Arrange a line of the spicy crab mixture horizontally across the bottom third of the rice. Top with slices of avocado and julienned cucumber. -
Step 5
Using the bamboo mat, carefully roll the sushi from the bottom up, tucking in the filling as you go. Apply gentle pressure to create a firm roll. Moisten the top border of the nori with a little water to seal the roll. -
Step 6
Sprinkle the outside of the roll with toasted sesame seeds. Slice the roll into 6-8 pieces using a sharp, wet knife. Serve with soy sauce.
Important Information
Nutrition Facts (Per Serving)
It is important to consider this information as approximate and not to use it as definitive health advice.
Allergy Information
Please check ingredients for potential allergens and consult a health professional if in doubt.