Easy Pickled Red Onions- Quick Vibrant Flavor
Pickled red onions are a culinary game-changer, and once you discover their vibrant magic, you’ll wonder how you ever lived without them. These ruby-hued beauties aren’t just a pretty face; they bring a burst of tangy, slightly sweet, and wonderfully crisp flavor to virtually anything they touch. Think of them as the ultimate flavor enhancer, capable of elevating everything from humble tacos and sandwiches to sophisticated salads and charcuterie boards. What makes pickled red onions so special? It’s that perfect balance of acidity and subtle sweetness, transforming a simple vegetable into an irresistible condiment. They cut through richness, add a delightful crunch, and offer a visual pop that makes any dish look instantly more appealing. I find myself reaching for them constantly, and I’m excited to share how easy it is to whip up your own batch of these dazzling pickled red onions.
Pickled Red Onions: Your Secret Ingredient for Instant Flavor
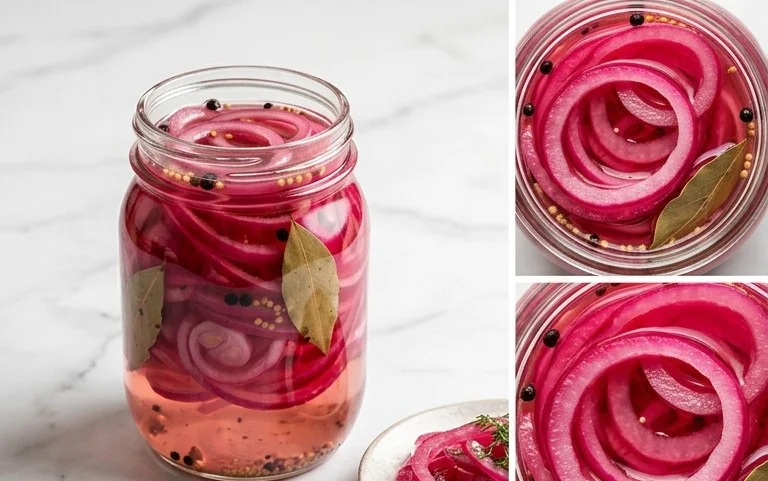
There are few condiments as versatile and transformative as pickled red onions. These vibrant jewels, with their perfect balance of sweet, sour, and a hint of pungent onion, can elevate everything from tacos and salads to burgers and charcuterie boards. They’re incredibly simple to make at home, requiring minimal effort and just a handful of common pantry staples. Forget those store-bought versions that can sometimes be overly sharp or bland. Making your own allows you to control the exact flavor profile, and the satisfaction of pulling a jar of these gorgeous pink pickled onions from your fridge is a small but mighty victory in any kitchen. They’re not just a garnish; they’re a flavor enhancer, a textural contrast, and a beautiful addition to any plate.
The magic of pickling is in its ability to preserve and transform. The vinegar tenderizes the onion slices, mellowing their raw bite while infusing them with a delightful tang. The sugar and salt work in harmony to create a balanced brine that draws out the natural sweetness of the red onion and enhances its overall flavor. The beautiful blush color that develops is simply a bonus, making your dishes visually appealing as well as delicious. I find myself reaching for a jar of these almost daily, whether I’m topping off my morning avocado toast, adding a zesty kick to a grilled cheese sandwich, or simply enjoying them straight from the jar (guilty as charged!). The process is so straightforward that it’s an ideal entry point into home pickling, and once you try them, you’ll wonder how you ever lived without them.
Ingredients:
Instructions:
Preparing the Onions:
The first step is all about getting your red onion ready for its flavorful transformation. You’ll want to start by peeling the outer papery skin from your large red onion. Once peeled, I like to slice the onion in half through the root end. This makes it easier to slice thinly. The goal here is to achieve uniformly thin slices. You can use a sharp chef’s knife and a steady hand, or for an even more consistent result, a mandoline slicer is your best friend. If you use a mandoline, please, please, please use the safety guard! Thin slices are key because they allow the brine to penetrate the onion quickly and evenly, ensuring they soften and pickle beautifully without becoming mushy. Aim for slices that are about 1/8 to 1/4 inch thick. If your slices are too thick, they won’t pickle as effectively, and if they’re too thin, they might break apart too easily. Once sliced, place the onion rings in a heatproof bowl or a large jar. I often use a large bowl initially, as it gives me more room to toss them around.
Making the Brine:
Now, let’s whip up that magical pickling brine. In a small saucepan, combine the white vinegar, water, sugar, and kosher salt. I prefer using white vinegar for pickling as it has a clean, neutral flavor that doesn’t overpower the onion. The water helps to temper the sharpness of the vinegar, creating a more balanced taste. The sugar is crucial for a touch of sweetness that rounds out the acidity, though as mentioned, you can adjust or omit this based on your preference. Kosher salt is my go-to for brining because its larger, irregular crystals dissolve well and provide excellent flavor without any anti-caking agents that can sometimes cloud pickling liquids. Place the saucepan over medium heat. Stir the mixture constantly until the sugar and salt have completely dissolved. You don’t need to bring it to a rolling boil; just heating it enough to ensure everything is incorporated is sufficient. This usually takes just a few minutes. Once dissolved, remove the saucepan from the heat.
Combining and Infusing:
This is where the magic truly begin extracts to happen. Carefully pour the warm brine over the sliced red onions that you prepared earlier. Make sure all the onion slices are submerged in the liquid. If you’re using a bowl, you might need to gently press down on the onions to ensure they are fully covered. If you’re using a jar, you can give it a gentle shake to help distribute the brine. At this stage, the onions will start to lose some of their raw bite and begin extract to absorb the pickling liquid. You’ll notice the color of the onions starting to deepen and their texture will gradually soften. This part of the process is where patience is rewarded. For the best results, I like to let them sit at room temperature for at least 30 minutes to an hour before transferring them to the refrigerator. This initial period at room temperature helps to start the pickling process more rapidly and allows the flavors to meld more effectively.
Chilling and Perfecting:
Once the onions have had a chance to sit at room temperature, it’s time to move them to their final resting place – the refrigerator. If you’re using a jar, you can simply place the lid on tightly. If you used a bowl, transfer the onions and their brine into an airtight container or a clean glass jar. The cold of the refrigerator slows down the pickling process, allowing the flavors to develop more deeply and the onions to achieve that perfect tender-crisp texture. I recommend letting them chill for at least an hour, but for the optimal flavor and texture, it’s best to let them pickle for at least a few hours, or ideally, overnight. The longer they sit, the more intense the flavor will become, and the more softened the onions will be. You’ll also notice that the onions will deepen in their beautiful pink hue as they pickle. They’re essentially ready to eat after about an hour, but the magic truly unfolds with a little more time in the fridge.
Storing and Enjoying:
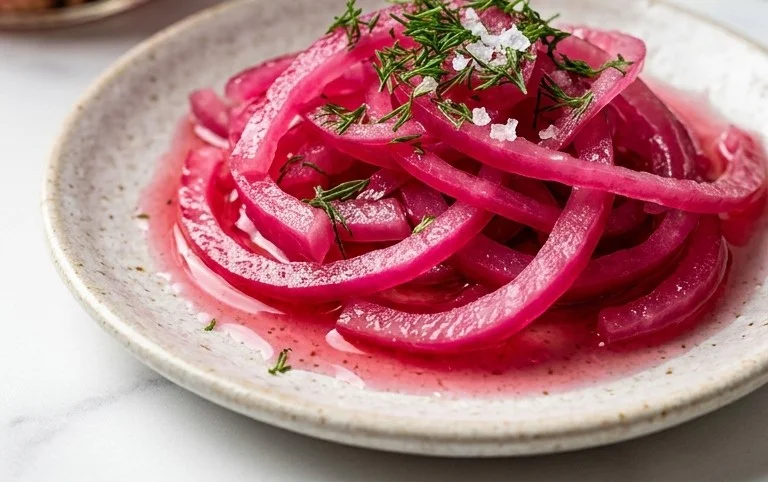
Your delicious homemade pickled red onions are now ready to be enjoyed! They can be stored in an airtight container or jar in the refrigerator for up to two weeks. The brine itself is also flavored and can be used in salad dressings or marinades if you like. What I love about these is their incredible versatility. They’re fantastic piled high on tacos, added to a gourmet burger, scattered over a vibrant salad, or served alongside grilled meats. They also make a stunning addition to a cheese board or as a quick topping for a simple avocado toast. Give them a try on a breakfast burrito, a pulled beef sandwich, or even as a zesty counterpoint to rich, fatty foods. The possibilities are truly endless, and the bright, tangy flavor they impart will undoubtedly become a staple in your culinary repertoire. Don’t be afraid to experiment with them – they’re designed to brighten up your meals!
Conclusion:
And there you have it – a simple, vibrant recipe for pickled red onions that will elevate countless dishes! This quick pickling method is incredibly rewarding, transforming humble red onions into a tangy, slightly sweet, and beautifully hued condiment. The ease of preparation combined with the dramatic flavor boost makes this a recipe I return to again and again. Whether you’re looking to add a pop of color to your tacos, a zing to your sandwiches, or a sophisticated garnish for your salads, these pickled red onions are a game-changer. I truly encourage you to give this recipe a try; it’s a fantastic way to add a gourmet touch to everyday meals without any fuss.
The versatility of these pickled red onions is truly remarkable. Beyond the usual suspects, they are wonderful atop avocado toast, stirred into grain bowls, or even served alongside roasted meats and grilled fish. For a slight variation, consider adding a pinch of red pepper flakes for a touch of heat, or a few sprigs of fresh dill or thyme during the pickling process for an extra layer of herbaceous flavor.
Frequently Asked Questions:
How long do pickled red onions last?
When stored in an airtight container in the refrigerator, these pickled red onions will stay fresh and delicious for about 2-3 weeks. The longer they sit, the more the flavors meld and deepen, so don’t be afraid to let them mature a bit!
Can I use a different type of onion?
While red onions are ideal for their color and slightly milder flavor, you can experiment with white or yellow onions. Keep in mind that the final color won’t be as vibrant. The pickling process will still tenderize them and add a pleasant tang, but the visual appeal will be different.
My pickled red onions are too sour, what can I do?
If you find them too sour upon tasting, you can drain some of the brine and replace it with a little extra water or a touch more sugar. Alternatively, you can rinse the onions briefly under cold water to remove some of the excess acidity. For future batches, you might want to slightly reduce the vinegar-to-water ratio.
Quick Pickled Red Onions
A quick and easy recipe for vibrant, tangy pickled red onions, perfect for topping salads, tacos, sandwiches, and more.
Ingredients
-
1 large Red onion
-
1 cup White Vinegar
-
1 cup Water
-
1 tablespoon Sugar
-
2 teaspoons Kosher salt
Instructions
-
Step 1
Thinly slice the red onion. A mandoline is helpful for even slices. -
Step 2
In a small saucepan, combine the white vinegar, water, sugar, and kosher salt. -
Step 3
Heat the mixture over medium heat, stirring until the sugar and salt are completely dissolved. Do not boil. -
Step 4
Place the sliced red onions into a heatproof jar or bowl. -
Step 5
Pour the hot pickling liquid over the onions, ensuring they are fully submerged. -
Step 6
Let the onions cool to room temperature, then cover and refrigerate for at least 30 minutes before serving. For best results, let them pickle for a few hours.
Important Information
Nutrition Facts (Per Serving)
It is important to consider this information as approximate and not to use it as definitive health advice.
Allergy Information
Please check ingredients for potential allergens and consult a health professional if in doubt.