Easy Scones Recipe – Delicious Homemade Treats
Scones Recipe: The quintessentially comforting and wonderfully versatile scone is a baking classic for a reason. Who can resist that perfectly tender crum extractb, the delicate crispness of the crust, and the sheer joy of slathering on butter, jam, or clotted cream? There’s something inherently special about homemade scones, a tangible act of love that transforms simple ingredients into pure delight. Whether you’re a seasoned baker or just starting out, mastering this essential scones recipe will bring immense satisfaction. They’re the ideal accompaniment to a morning coffee, an afternoon tea, or even a light dessert. The magic lies in their simplicity and the endless possibilities for customization. We’re about to embark on a journey to create your best batch of scones yet.
Scones Recipe
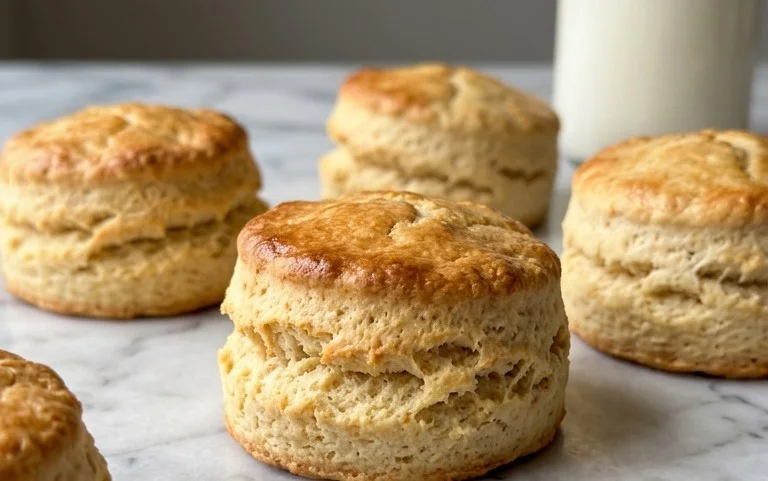
There’s something incredibly comforting about a warm, freshly baked scone. Whether it’s the slightly crum extractbly texture, the hint of sweetness, or the versatility to pair with almost anything, scones are a delightful treat for any occasion. From a leisurely breakfast to an afternoon tea, these simple yet elegant pastries are sure to impress. Today, I’m sharing my go-to recipe for perfect, fluffy scones that are incredibly easy to make. We’ll be using a few simple ingredients that I bet you already have in your pantry, and the best part is, you can customize them with your favorite mix-ins. Get ready to bake up a batch of pure bliss!
Ingredients:
Baking Your Perfect Scones
The key to light and fluffy scones lies in a few crucial techniques. We want to keep the butter cold and handle the dough as little as possible. This ensures that when the scones bake, the small pieces of butter will melt and create steam, resulting in those wonderful pockets of air that give scones their signature texture.
Step 1: Preparing the Dry Ingredients
In a large bowl, whisk together the all-purpose flour, granulated sugar, baking powder, and salt. This step ensures that all the dry ingredients are evenly distributed, which is important for consistent leavening and flavor. Make sure there are no lumps of baking powder or salt.
Step 2: Cutting in the Cold Butter
Now, add the cold, cubed unsalted butter to the dry ingredients. I like to use my fingertips for this, but you can also use a pastry blender or two knives. The goal is to cut the butter into the flour until the mixture resembles coarse crum extractbs, with some pieces of butter about the size of small peas. It’s really important that the butter stays cold throughout this process. If your kitchen is warm, you can even pop the bowl of dry ingredients and butter into the freezer for about 10 minutes before you start cutting it in. This is where the magic starts to happen for that tender crum extractb!
Step 3: Incorporating the Wet Ingredients
In a separate small bowl, whisk together the ½ cup plus 1 tablespoon of heavy cream and the lightly beaten large egg. Make a well in the center of your flour and butter mixture and pour in the cream and egg mixture. Gently stir with a fork or spatula until just combined. Be careful not to overmix! Overmixing will develop the gluten in the flour too much, leading to tough scones. We’re looking for a shaggy dough that just comes together.
Step 4: Adding Your Mix-Ins and Shaping the Dough
Now it’s time for the fun part – adding your mix-ins! Gently fold in your chosen ingredients, whether it’s juicy fresh berries, tart cranberries, or sweet chocolate chips. Again, be gentle and try not to overmix. Once the mix-ins are distributed, turn the dough out onto a lightly floured surface. Gently bring the dough together with your hands and pat it into a disk about ¾ to 1 inch thick.
Step 5: Cutting and Baking the Scones
Using a sharp knife or a bench scraper, cut the disk into 6 to 8 wedges, like cutting a pizza. You can also use a round biscuit cutter if you prefer a more uniform shape. Place the scones onto a baking sheet lined with parchment paper. For an extra golden and slightly crisp top, brush the tops of the scones with a little extra heavy cream. Bake in a preheated oven at 400°F (200°C) for 15-20 minutes, or until the scones are puffed up and golden brown. The exact baking time will depend on your oven and the size of your scones.
Step 6: Cooling and Serving
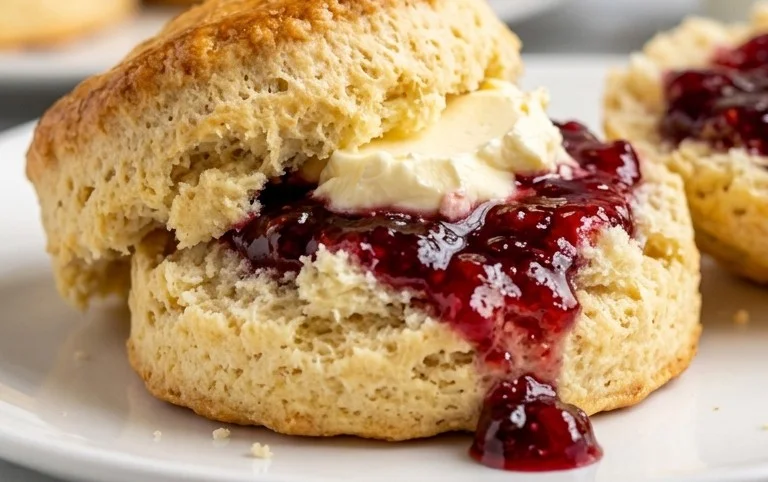
Once baked, transfer the scones to a wire rack to cool slightly. Scones are best enjoyed warm, so serve them as soon as they are cool enough to handle. They are absolutely divine with a dollop of clotted cream and your favorite jam, or even just a smear of good quality butter. Enjoy the fruits of your labor – these homemade scones are a true taste of comfort!
Conclusion:
There you have it – your guide to baking the most delightful scones! This recipe is truly wonderful because it’s incredibly forgiving, resulting in tender, buttery scones with that perfect crum extractb every single time. Whether you’re a seasoned baker or just starting out, you’ll find this straightforward process a joy. These scones are incredibly versatile; they’re fantastic served warm with a dollop of clotted cream and your favorite jam for a classic afternoon tea. For a more savory twist, consider adding herbs like chives or rosemary, or even a sprinkle of cheese to the dough. Don’t be afraid to experiment with different additions like fresh berries, dried fruit, or even chocolate chips for a sweet treat. I truly encourage you to give this scones recipe a try – I promise you won’t be disappointed!
Frequently Asked Questions:
What is the secret to light and fluffy scones?
The key to achieving light and fluffy scones lies in a few crucial steps. Firstly, ensure your butter is very cold and cut into small pieces. This helps create steam when baking, leading to a lighter texture. Secondly, avoid overworking the dough. Mix the wet and dry ingredients until just combined; a shaggy dough is perfectly fine. Overmixing develops the gluten too much, resulting in tough scones.
Can I make the scone dough ahead of time?
Yes, you absolutely can! You can prepare the scone dough up to the point of shaping and cutting them. Once cut, you can place them on a baking sheet lined with parchment paper, cover them loosely with plastic wrap, and refrigerating them for up to 24 hours. When you’re ready to bake, you can bake them directly from the refrigerator, though they might need an extra minute or two in the oven. Enjoy your freshly baked scones whenever you please!
Classic Scones Recipe
A simple and versatile recipe for making delicious, flaky scones, perfect for breakfast or tea time. Customize with your favorite mix-ins.
Ingredients
-
6 tablespoons unsalted butter
-
2 cups all-purpose flour
-
⅓ cup granulated sugar
-
1 tablespoon baking powder
-
½ teaspoon salt
-
½ cup plus 1 tablespoon heavy cream
-
1 large egg
-
up to 1 cup total mix-ins, as desired
Instructions
-
Step 1
Preheat your oven to 400°F (200°C). Line a baking sheet with parchment paper. -
Step 2
In a large bowl, whisk together the all-purpose flour, granulated sugar, baking powder, and salt. -
Step 3
Cut in the cold unsalted butter using a pastry blender or your fingertips until the mixture resembles coarse crumbs. -
Step 4
In a separate small bowl, whisk together the heavy cream and the lightly beaten egg. Add this to the dry ingredients and mix until just combined. Do not overmix. Gently fold in your desired mix-ins. -
Step 5
Turn the dough out onto a lightly floured surface and gently pat it into a disk about ¾-inch thick. Cut out scones using a round cutter or knife. -
Step 6
Place the scones on the prepared baking sheet. Brush the tops with a little extra heavy cream for a golden finish. -
Step 7
Bake for 12-15 minutes, or until golden brown and cooked through.
Important Information
Nutrition Facts (Per Serving)
It is important to consider this information as approximate and not to use it as definitive health advice.
Allergy Information
Please check ingredients for potential allergens and consult a health professional if in doubt.