Bunny Rabbit Cake Recipe- Easy & Fun Easter Treat
The Bunny Rabbit Cake is an absolute delight, a showstopper that never fails to bring smiles and gasps of joy to any celebration! There’s something inherently magical about a cake shaped like an adorable bunny. It’s not just a dessert; it’s a centerpiece, a conversation starter, and a cherished memory waiting to happen. We all love a good reason to bake something fun, and this whimsical creation is perfect for Easter, birthdays, or just because you want to add a touch of playful charm to your table. What makes this Bunny Rabbit Cake so special is its versatility. You can customize the flavors, the frosting, and even the decorations to perfectly match your personal style and the occasion. It’s surprisingly achievable for home bakers, proving that you don’t need to be a professional pastry chef to create something truly extraordinary.
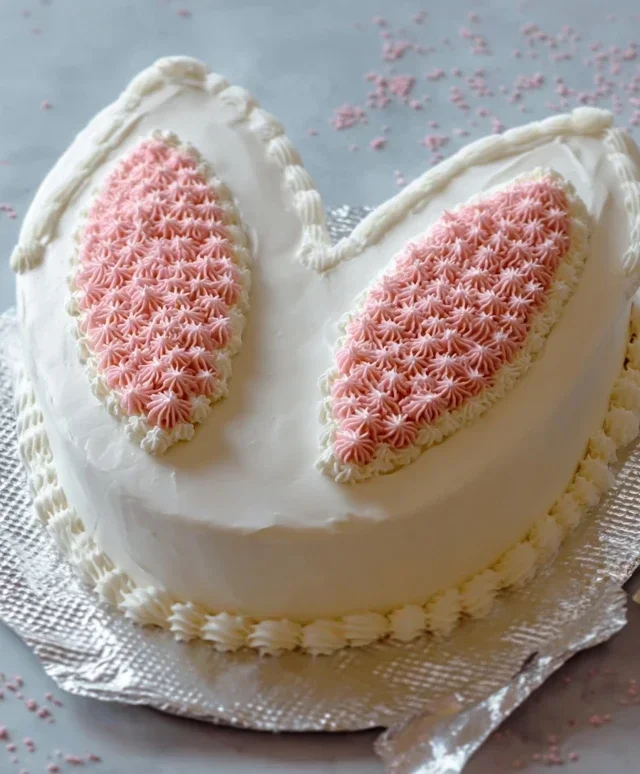
Bunny Rabbit Cake
Spring is in the air, and what better way to celebrate the season of renewal than with a delightful Bunny Rabbit Cake? This charming creation is perfect for Easter gatherings, spring birthdays, or just to bring a smile to someone’s face. It’s a bit of a showstopper, but surprisingly achievable for home bakers. We’ll guide you through creating this whimsical centerpiece, step-by-step, ensuring a delicious and visually appealing result that will have everyone hopping with joy.
Ingredients:
Baking the Cake
First, let’s get our cake layers ready. This recipe utilizes a standard yellow cake mix for simplicity and consistent results, allowing us to focus on the fun decorating part. Preheat your oven to the temperature specified on your cake mix box, usually 350 degrees Fahrenheit (175 degrees Celsius). Grease and flour your 9-inch round cake pan and your oven-safe bowl. For the bowl, make sure it’s a size that will comfortably fit your desired head proportion to the body. A bowl with a rounded bottom works best.
In a large mixing bowl, prepare the cake batter according to the instructions on the yellow cake mix box. This typically involves adding the eggs, oil, and water. Mix until just combined; overmixing can lead to a tough cake.
Now, we need to divide the batter. Pour about two-thirds of the batter into the prepared 9-inch round cake pan. This will be our bunny’s body. Carefully spoon the remaining one-third of the batter into the prepared oven-safe bowl. Smooth the tops of both the batter in the pan and the bowl so they bake evenly.
Bake the round cake for the time recommended on the box, or until a wooden skewer inserted into the center comes out clean. The cake in the bowl will likely take a slightly different amount of time to bake, so keep an eye on it. You’re looking for it to be cooked through, with a springy texture when lightly touched. Once baked, let both cakes cool in their pans for about 10-15 minutes before inverting them onto a wire rack to cool completely. It’s crucial that the cakes are entirely cool before you begin extract decorating, otherwise, your frosting will melt.
Assembling and Frosting the Bunny
Once our cake components are completely cool, it’s time to bring our bunny to life! Place the larger, round cake onto your serving platter or cake board. This is the bunny’s body.
Now, take the domed cake that was baked in the bowl and carefully place it on top of the round cake, positioning it towards the top edge to create the bunny’s head. You might need to trim a little off the flat bottom of the domed cake if it doesn’t sit flush against the round cake, but don’t worry about perfection here; a slightly off-kilter bunny can be charming!
Now, let’s get frosting! In a medium bowl, combine your vanilla frosting with a few drops of brown food coloring. Mix until you achieve a light tan or beige color. This will be the main fur color of our bunny. Generously frost the entire body and head of the bunny with this brown frosting, using an offset spatula to get an even coating. Don’t worry about making it perfectly smooth; a slightly textured finish can mimic fur.
Creating the Bunny’s Features
For the bunny’s face, we need a different color. In a separate small bowl, take a small amount of the remaining white frosting and mix in a few drops of pink food coloring. You’re aiming for a soft pink hue.
Now, let’s add some detail. You can use a piping bag fitted with a round tip, or simply a zip-top bag with a small corner snipped off, to create the bunny’s muzzle. Pipe a small oval shape on the lower part of the bunny’s head. You can then use a bit of brown frosting and a toothpick to draw a small nose within the pink oval. For the mouth, draw a simple “w” shape extending from the nose.
Next, let’s create those adorable ears. Take your large marshmallows. You’ll need two for the ears. Using a sharp knife, cut each marshmallow in half diagonally. These cut surfaces will be the inside of the ears. You can either place these directly onto the cake, sticking them in with a bit of frosting, or for a more defined look, you can gently press the cut side into a small amount of pink frosting before attaching them. Position these ears upright on the top of the bunny’s head. For extra stability, you can insert a toothpick into the bottom of the marshmallow halves and then push the toothpick into the cake.
If you have them, edible googly eyes are a fun and easy way to give your bunny personality. Alternatively, you can use small chocolate chips or even carefully piped dots of brown frosting for eyes. Place them above the muzzle and nose.
Adding the Finishing Touches
For the bunny’s tail, the remaining large marshmallows come in handy again. You can leave one marshmallow whole and frost it with your brown frosting, or if you have extra marshmallows, you can gently shape a couple together with frosting to create a fuller tail. Attach this fluffy tail to the back of the bunny’s body.
If you want to create a grassy base for your bunny, spread a thin layer of white frosting on your serving platter around the cake. Then, sprinkle the shredded coconut over the frosting. This creates a lovely, festive effect that looks just like spring grass. You can also add colorful sprinkles to the grass for extra cheer.
This Bunny Rabbit Cake is not just a dessert; it’s a centerpiece that will be the talk of your spring celebration. The process of making it is as enjoyable as eating it, and the end result is truly magical. Don’t be afraid to get creative with your decorations – the more personal touches you add, the more special your bunny will be! Enjoy every bite of this sweet and whimsical creation!
Conclusion:
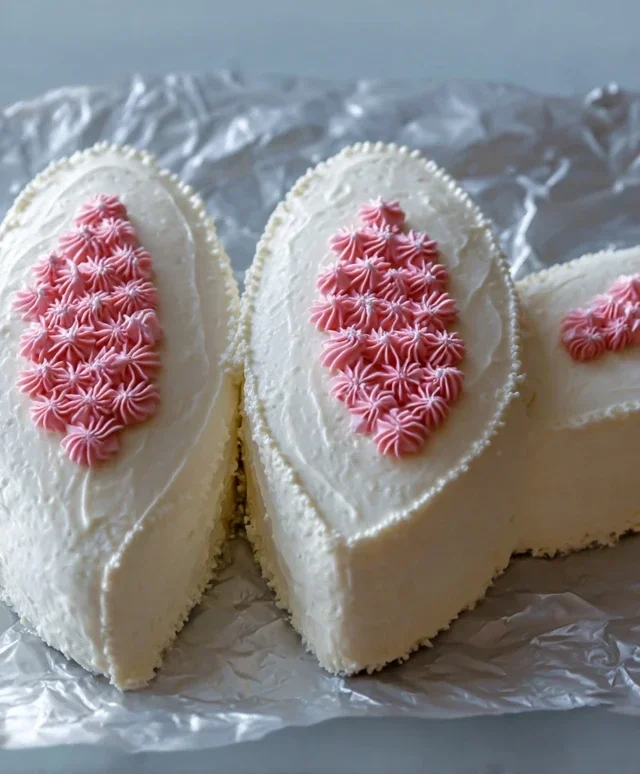
Making this Bunny Rabbit Cake is truly a delightful experience, bringin extractg joy to both the baker and the lucky ones who get to enjoy its adorable presence. Its charm lies in its simplicity, allowing you to create a showstopper without needing advanced decorating skills. Whether you’re celebrating Easter, a child’s birthday, or just want to add a touch of whimsical fun to your dessert table, this Bunny Rabbit Cake recipe is a guaranteed winner. The fluffy cake base, combined with your favorite frosting, creates a delicious and visually stunning treat that’s sure to be a hit. I encourage you all to give this recipe a try; you might be surprised at how easy and rewarding it is!
For serving, this cake is perfect on its own, but consider pairing it with fresh berries or a dollop of whipped cream for extra indulgence. Looking for variations? You can easily adapt the cake flavor to your liking – a chocolate cake base or a lemon-zest infused batter would be equally charming. Don’t be afraid to get creative with the decorations too; sprinkle edible glitter for a magical touch or use different colored candies for the bunny’s features.
Frequently Asked Questions:
Can I make this Bunny Rabbit Cake ahead of time?
Absolutely! You can bake the cake layers and store them tightly wrapped at room temperature for up to two days, or freeze them for longer storage. Frosting the cake is best done the day of serving for the freshest appearance, but the decorated cake can generally be stored loosely covered in the refrigerator for a day.
What if I don’t have piping bags for the frosting?
No problem! You can achieve a beautiful frosted look by using a spatula to spread the frosting evenly over the cake. For details like the eyes and nose, you can use a small spoon or even the tip of a butter knife to create them. The focus is on the overall shape and cuteness, so don’t stress about perfection!
How can I make the bunny ears stand up better?
To ensure your bunny ears are sturdy, you can bake them as separate cake pieces (perhaps in small loaf pans or even mold them by hand if using fondant for decoration) and then secure them to the cake head with a bit of frosting. For a simpler approach, ensure the cake used for the ears is well-baked and slightly denser. You can also use toothpicks to gently support them from underneath if needed.
Bunny Rabbit Cake
A delightful bunny-shaped cake perfect for Easter or any celebration. This recipe yields a moist and tender cake with a sweet frosting.
Ingredients
-
2 cups all-purpose flour
-
1 ½ cups granulated sugar
-
1 teaspoon baking soda
-
½ teaspoon salt
-
1 cup buttermilk
-
½ cup unsalted butter, softened
-
2 large eggs
-
1 teaspoon vanilla extract
-
2 cups powdered sugar
-
¼ cup milk
Instructions
-
Step 1
Preheat oven to 350°F (175°C). Grease and flour a bunny-shaped cake pan. -
Step 2
In a large bowl, whisk together flour, sugar, baking soda, and salt. -
Step 3
In a separate bowl, whisk together buttermilk, softened butter, eggs, and vanilla extract until well combined. -
Step 4
Gradually add the wet ingredients to the dry ingredients, mixing until just combined. Do not overmix. -
Step 5
Pour batter into the prepared cake pan and bake for 30-35 minutes, or until a toothpick inserted into the center comes out clean. -
Step 6
Let the cake cool in the pan for 10 minutes before inverting it onto a wire rack to cool completely. -
Step 7
While the cake cools, prepare the frosting by beating powdered sugar and milk until smooth and creamy. -
Step 8
Once the cake is completely cooled, frost it using the prepared frosting. Decorate as desired.
Important Information
Nutrition Facts (Per Serving)
It is important to consider this information as approximate and not to use it as definitive health advice.
Allergy Information
Please check ingredients for potential allergens and consult a health professional if in doubt.