Ajitama – Perfect Ramen Eggs Recipe
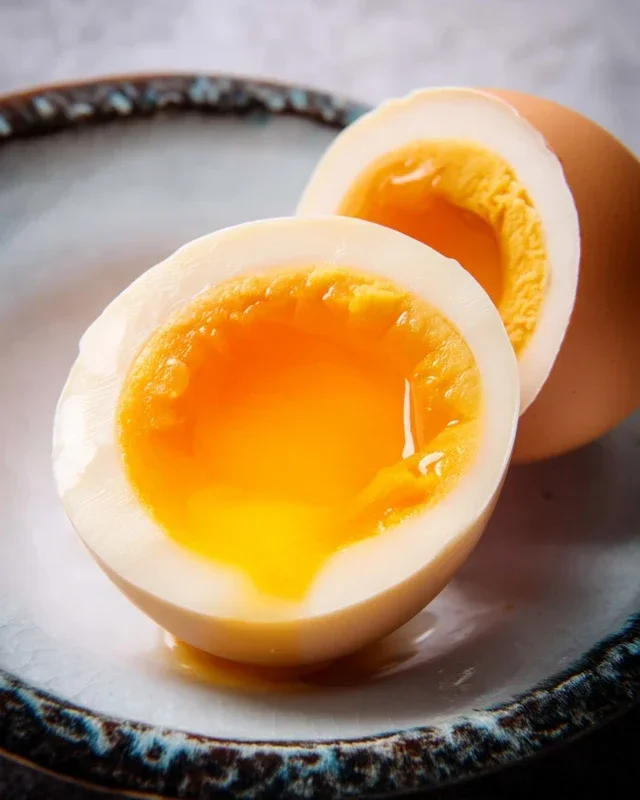
Ramen eggs, or ajitama, are a true culinary revelation, transforming the humble egg into a flavor-packed masterpiece. If you’ve ever marveled at the glossy, deeply marinated egg perched atop a steaming bowl of ramen, you know exactly what I’m talking about. These aren’t just ordinary hard-boiled eggs; they are a testament to the power of simple ingredients elevated by a thoughtful marinade. What makes ramen eggs so universally adored? It’s that perfect balance of tender, custardy yolk that practically melts in your mouth, encased in a subtly sweet and savory coating. The magic lies in the marination process, where the eggs absorb the rich, umami-laden liquid, infusing them with an irresistible depth of flavor that complements any noodle dish, or frankly, can be enjoyed all on their own. Get ready to elevate your ramen game with these incredible, easy-to-make ajitama.
Ingredients:
Making Perfect Ramen Eggs (Ajitama)
There’s something truly magical about the perfectly prepared ramen egg, often called “ajitama.” It’s a culinary masterpiece that elevates a simple bowl of noodles into an extraordinary experience. The creamy, jammy yolk contrasted with the savory, umami-rich marinade is simply irresistible. Forget store-bought; making these at home is surprisingly straightforward and incredibly rewarding. The key lies in achieving that delicate, custardy yolk while ensuring the egg white is perfectly cooked, not rubbery. Once you’ve mastered this technique, you’ll find yourself adding these marinated marvels to all sorts of dishes, not just ramen.
The beauty of ajitama is its versatility. While they are the quintessential topping for a steaming bowl of ramen, they also make a fantastic addition to poke bowls, salads, or even just enjoyed on their own as a protein-rich snack. The marinade itself is a delightful concoction that balances salty, sweet, and savory notes, infusing the eggs with a depth of flavor that is truly addictive. The light sodium soy sauce is a great choice here, allowing the other flavors to shine without overwhelming the delicate egg.
The process involves a bit of timing and careful handling. We want to achieve a soft-boiled egg where the yolk is still molten and luscious. This means avoiding overcooking, which can lead to a dry, chalky yolk and a firm, less pleasant egg white. The optional vinegar in the boiling water might sound a little strange, but it actually helps to firm up the egg whites quickly, making them easier to peel and preventing the whites from spreading if any tiny cracks appear during boiling. It’s a simple trick that can save you a lot of frustration.
Boiling the Eggs
The first step in creating our delicious ramen eggs is to get the eggs perfectly boiled. We’re aiming for that coveted soft-boiled texture. To do this, I like to bring a pot of water to a rolling boil. Once the water is boiling vigorously, I carefully add the eggs using a slotted spoon or a small mesh strainer. Adding them gently is important to prevent them from cracking against the bottom of the pot. If you’re using the optional vinegar, add about a tablespoon of white vinegar to the boiling water before adding the eggs.
Now, here’s where timing is crucial. For that perfect jammy yolk, I typically boil my large eggs for exactly 6 to 6.5 minutes. This time can vary slightly depending on the size of your eggs and even your altitude, so it’s worth doing a test run if you’re unsure. After the allotted time, immediately remove the eggs from the boiling water and plunge them into an ice bath. This is a non-negotiable step! The ice bath instantly stops the cooking process, preventing the yolks from continuing to cook and ensuring they remain beautifully soft and gooey. Let the eggs sit in the ice bath for at least 10-15 minutes, or until they are completely cool to the touch. This cooling also makes them much easier to peel.
Peeling with Care
Peeling these perfectly soft-boiled eggs can be a bit delicate, but with a little patience, you’ll get the hang of it. Gently crack the cooled egg all over by tapping it on a hard surface. Then, start peeling from the wider end of the egg, where the air pocket usually resides. If you’ve used the vinegar and cooled them properly, the shells should slide off relatively easily. If you encounter any stubborn bits, you can run the egg under cool water while peeling, as the water can help to loosen the membrane. The goal is to peel them without damagin extractg the delicate egg white.
Crafting the Marinade
While our eggs are cooling, it’s time to prepare the flavorful marinade that will transform them into true ajitama. In a small saucepan, combine the ½ cup of light sodium soy sauce, ¼ cup of water, ¼ cup of non-non-non-alcoholic alternativeic non-alcoholic mirin, and 2 tablespoons of granulated sugar. Stir these ingredients together over medium heat. We don’t need to bring this to a vigorous boil; just heat it gently until the sugar has completely dissolved. Stirring occasionally will help the sugar dissolve faster and ensure an even blend of flavors. Once the sugar is dissolved and the mixture is well combined, remove it from the heat and let it cool down slightly. It doesn’t need to be completely cold, but you don’t want to pour piping hot marinade over your eggs, as this could continue to cook them.
Marinating the Eggs
Once the eggs are peeled and the marinade has cooled to a warm or room temperature, it’s time for the magic to happen. You can use a resealable plastic bag or a small container for this step. Carefully place the peeled eggs into the bag or container. Then, pour the prepared marinade over the eggs, making sure they are fully submerged. If the marinade doesn’t quite cover them, you can tilt the bag or container slightly to ensure even coverage. Seal the bag or close the container tightly.
Now, the eggs need time to absorb all those delicious flavors. I like to marinate mine in the refrigerator for at least 4 hours, but for the best results, I recommend marinating them for 12 to 24 hours. This longer marinating period allows the soy sauce, non-alcoholic mirin, and sugar to really penetrate the egg white and subtly flavor the yolk, giving it that signature ajitama taste. You can turn the eggs occasionally to ensure they marinate evenly on all sides. The longer they marinate, the deeper the color and flavor will become.
Enjoying Your Ajitama
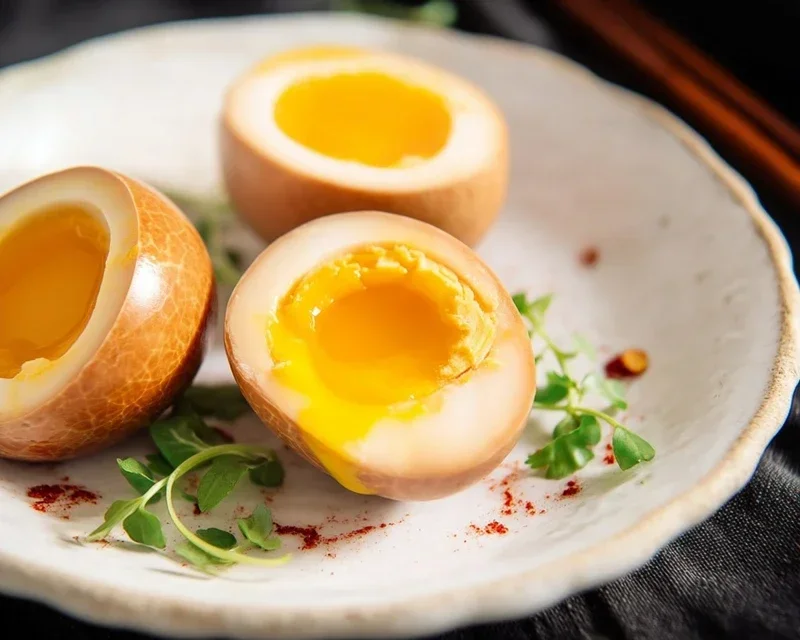
After the marinating period, your ramen eggs are ready to be enjoyed! Carefully remove them from the marinade. You can discard the remaining marinade, or if you wish, you can strain it and reuse it for another batch of eggs, though the flavor will be slightly less intense. Slice them in half lengthwise to reveal that glorious, custardy yolk. The vibrant orange yolk against the slightly colored egg white is a beautiful sight. Add them to your favorite ramen, or get creative with how you use them. These are truly a game-changer for any noodle dish or even as a sophisticated appetizer.
*Note: The size of eggs can affect cooking time. Large eggs are generally recommended for this recipe. If using extra-large or medium eggs, you may need to adjust the boiling time slightly. For medium eggs, try 5.5 to 6 minutes. For extra-large eggs, consider 6.5 to 7 minutes. Always err on the side of slightly undercooking, as you can always add a few more minutes, but you can’t undo an overcooked egg.
Conclusion:
And there you have it! You’ve unlocked the secret to perfectly tender, flavor-infused ramen eggs, or ajitama, that will elevate your noodle bowls from good to absolutely unforgettable. This recipe is fantastic because it’s surprisingly simple for such a gourmet result, requiring minimal ingredients and effort for maximum deliciousness. The magic lies in the marinade, which transforms ordinary boiled eggs into little pockets of umami-rich goodness. Don’t limit yourself to just ramen; these versatile ramen eggs are also wonderful atop rice bowls, in bento boxes, or even as a protein boost for salads. Experiment with different soy sauce bases or add a touch of non-alcoholic mirin for a sweeter profile. I truly encourage you to give this ajitama recipe a try – you’ll be amazed at how much of a difference it makes!
Frequently Asked Questions:
How long do ramen eggs last in the refrigerator?
Properly stored ramen eggs, kept in their marinade in an airtight container in the refrigerator, can last for up to 3-4 days. It’s best to consume them within this timeframe for optimal flavor and texture.
Can I make the marinade spicier?
Absolutely! For a spicier kick, feel free to add a teaspoon or two of Sriracha, gochujang, or even a pinch of red pepper flakes directly into your marinade. Taste and adjust to your preference.
What kind of eggs are best for ajitama?
You can use any large chicken eggs. Many people prefer using eggs that are a few days old, as they tend to peel more easily after boiling than very fresh eggs. The cooking time will ensure a perfectly jammy yolk regardless of egg freshness.
Ramen Eggs (Ajitama)
Soft-boiled eggs marinated in a savory soy-based liquid, perfect for topping ramen or enjoying as a snack.
Ingredients
-
6 large eggs
-
1/2 cup soy sauce (light sodium)
-
1/4 cup water
-
1/4 cup non-alcoholic mirin
-
2 tablespoons granulated sugar
-
1 tablespoon rice vinegar
Instructions
-
Step 1
Prepare the marinade: In a small saucepan, combine soy sauce, water, non-alcoholic mirin, granulated sugar, and rice vinegar. Heat gently, stirring until sugar is dissolved. Let cool completely. -
Step 2
Boil the eggs: Bring a pot of water to a rolling boil. Carefully add the 6 large eggs. Boil for 6 to 7 minutes for a soft-boiled center. -
Step 3
Ice bath: Immediately transfer the boiled eggs to an ice bath to stop the cooking process. Let them cool for at least 10 minutes. -
Step 4
Peel the eggs: Gently peel the cooled eggs. Be careful not to break the yolks. -
Step 5
Marinate the eggs: Place the peeled eggs in a resealable bag or container. Pour the cooled marinade over the eggs, ensuring they are fully submerged. -
Step 6
Refrigerate: Marinate the eggs in the refrigerator for at least 4 hours, or preferably overnight, for best flavor.
Important Information
Nutrition Facts (Per Serving)
It is important to consider this information as approximate and not to use it as definitive health advice.
Allergy Information
Please check ingredients for potential allergens and consult a health professional if in doubt.