Buttery Garlic Pizza-Easy Flavorful Recipe
Buttery garlic pizza is the kind of dish that whispers pure comfort directly into your soul. It’s a culinary hug, a golden ticket to happiness on a plate. Forget complicated toppings; this recipe celebrates the divine simplicity of rich, melted butter infused with fragrant garlic, generously blanketing a perfectly baked pizza crust. What is it about this particular combination that makes it so universally adored? It’s the irresistible aroma that fills your kitchen as it bakes, the way the garlic’s pungent bite is mellowed by the creamy sweetness of butter, and the satisfying chew of the crust beneath it all. This isn’t just pizza; it’s an experience, a delicious journey back to childhood memories or the genesis of new, cherished traditions. Get ready to fall head over heels for this incredibly easy yet utterly spectacular buttery garlic pizza.
Why You’ll Love This Recipe
Simple Ingredients, Extraordinary Flavor
Perfect for Weeknights or Entertaining
The Ultimate Garlic Lover’s Dream
Buttery Garlic Pizza
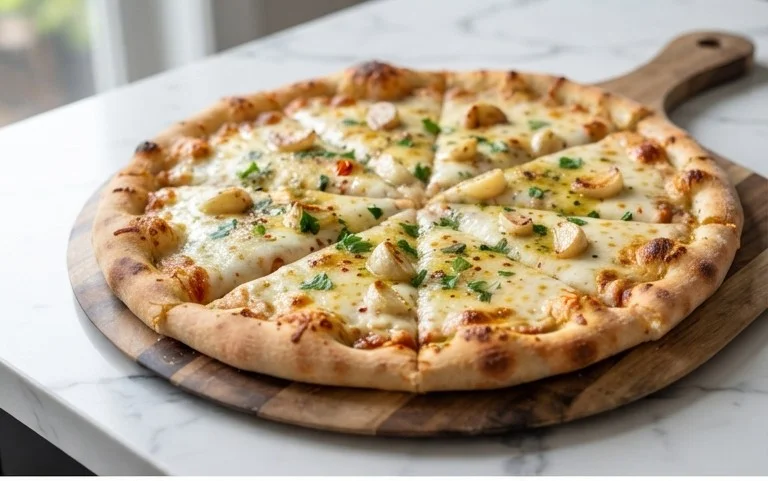
There’s something incredibly comforting and satisfying about a delicious pizza. While we all love a classic marinara or a loaded beef pepperoni, sometimes you crave something a little more nuanced, something that lets simple, high-quality ingredients shine. Enter our Buttery Garlic Pizza. This isn’t your typical pizza with a heavy sauce; it’s an elegant celebration of fragrant garlic, rich butter, and fresh herbs, all on a perfectly baked crust. It’s surprisingly simple to make, yet the flavor profile is sophisticated enough for a casual dinner party or a cozy night in. The magic happens in the garlic-herb butter that forms the base of this pizza, infusing every bite with warmth and aroma. Get ready to impress yourself and anyone lucky enough to share this with you.
Ingredients:
Cooking Instructions:
We’re going to break this down into a few key stages to ensure perfection. First, we’ll create our star: the garlic-herb butter. Then, we’ll prepare our pizza dough, get our oven ready, and finally, assemble and bake this masterpiece.
1. Crafting the Aromatic Garlic-Herb Butter
This is where all the flavor begin extracts. Take your stick of salted butter and place it in a small, microwave-safe bowl or a small saucepan if you prefer to melt it on the stovetop. If microwaving, heat in 20-second intervals, stirring in between, until the butter is completely melted but not browned. We want it just liquid. Once melted, add your finely chopped garlic cloves to the warm butter. The residual heat of the butter will begin extract to gently cook the garlic, releasing its pungent aroma and mellowing its sharpness into a sweet, savory depth. Let this mixture sit for at least 5 minutes, or even up to 10 minutes, to allow the flavors to meld beautifully. After the garlic has had its infusion time, stir in the minced green onion, minced rosemary, and fresh thyme. Mix everything together thoroughly. The herbs will start to rehydrate and release their oils into the butter, creating a truly non-intoxicating scent. This buttery, garlicky, herbaceous concoction is the heart and soul of our pizza.
2. Preparing the Pizza Dough
While our garlic-herb butter is doing its thing, let’s get our pizza dough ready. If your dough is from the refrigerator, let it sit at room temperature for about 30-60 minutes before you plan to use it. This is crucial for making the dough pliable and easy to stretch. Cold dough is notoriously difficult to work with and will likely spring back on you. Once it’s had time to warm up, lightly flour a clean work surface and your hands. Gently press down on each dough ball, starting from the center and working your way outwards. You want to create a rustic, uneven edge, as this will puff up beautifully in the oven. Avoid overworking the dough; the goal is to stretch it to your desired thickness, typically about a 10-12 inch circle. If the dough is being stubborn, let it rest for another 5-10 minutes, covered loosely with a clean kitchen towel, and then try again. Patience here will be rewarded with a light and airy crust.
3. Preheating the Oven and Baking Surface
A hot oven is non-negotiable for a great pizza. Preheat your oven to the highest temperature it can go, usually between 475°F and 500°F (245°C – 260°C). If you have a pizza stone or steel, place it in the oven during the preheating phase. This allows the stone or steel to get screaming hot, mimicking the intense heat of a professional pizza oven and ensuring a crispy, golden-brown crust. If you don’t have a pizza stone or steel, you can use a heavy-duty baking sheet. Just ensure it’s also preheated in the oven. A hot surface is key to achieving that desirable “oven spring” and preventing a soggy bottom.
4. Assembling Your Buttery Garlic Masterpiece
Now for the fun part! Once your dough is stretched, carefully transfer it to a piece of parchment paper or a lightly floured pizza peel. This makes it much easier to slide the pizza into the hot oven. Take your prepared garlic-herb butter and brush it generously over the entire surface of the pizza dough, all the way to the edges. Don’t be shy – this is what makes it “buttery” garlic pizza! Ensure an even coating. Next, season the pizza with flaky salt and freshly ground black pepper. Then, sprinkle on your desired amount of red pepper flakes. You can add a little for a subtle warmth or go bold for a spicier kick. This is also the point where you can add any other toppings you desire, though this pizza truly shines with its simple elegance.
5. Baking and Finishing Touches
Carefully slide your assembled pizza onto the preheated pizza stone, steel, or baking sheet. If using parchment paper, you can often pull it out from under the pizza halfway through baking for an even crispier bottom. Bake for 8-12 minutes, or until the crust is golden brown and puffed up, and the cheese (if you’ve added any, though this recipe is fantastic even without) is melted and bubbly. Keep an eye on it, as oven temperatures can vary. Once it’s out of the oven, immediately sprinkle the minced chives over the hot pizza. The residual heat will slightly wilt them and release their fresh, oniony flavor. Let the pizza cool for just a minute or two before slicing and serving. The aroma will be incredible, and the taste will be even better. Enjoy every single buttery, garlicky, herby bite!
Conclusion:
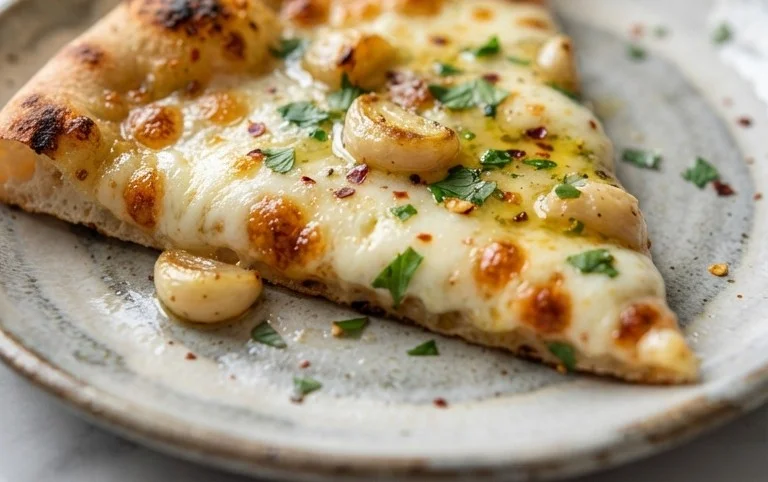
I hope you’re as excited as I am to try this incredibly simple yet utterly delicious buttery garlic pizza! What makes this recipe so fantastic is its sheer versatility and the way the simple, classic flavors of butter and garlic come together to create something truly special. It’s the perfect canvas for your favorite toppings, making it a crowd-pleaser for any occasion. Whether you’re looking for a quick weeknight dinner, a sophisticated appetizer, or a comforting snack, this buttery garlic pizza delivers. Don’t be afraid to experiment with different cheeses and add fresh herbs like parsley or basil for an extra pop of flavor. I highly encourage you to gather your ingredients and experience the magic of this recipe for yourself. You won’t regret it!
Frequently Asked Questions:
What are some great serving suggestions for this buttery garlic pizza?
This buttery garlic pizza is wonderful on its own as a delightful appetizer. It also pairs beautifully with a fresh side salad, especially one with a light vinaigrette. For a more substantial meal, consider serving it alongside a hearty soup or as a flavorful accompaniment to grilled chicken or fish. The simple, rich flavor profile makes it a versatile choice for many dining scenarios.
Can I add other toppings to this buttery garlic pizza?
Absolutely! The beauty of this recipe is its adaptability. You can easily add your favorite pizza toppings. Consider roasted vegetables like bell peppers, onions, or mushrooms. For a touch of spice, add some red pepper flakes. Even a sprinkle of parmesan cheese after baking adds another layer of savory goodness. The buttery garlic base is a fantastic starting point for countless delicious variations.
How can I make this buttery garlic pizza even more garlicky?
If you’re a true garlic lover, you can easily amp up the garlic flavor. Try roasting a whole head of garlic until soft and then mashing it into the butter mixture before spreading it on the pizza dough. You could also mince an extra clove or two of fresh garlic and add it directly to the butter before melting. Just remember to bake it a little longer to mellow out the raw garlic flavor if you add it raw.
Buttery Garlic Pizza
A simple yet incredibly flavorful pizza featuring a rich butter-garlic sauce and fresh herbs.
Ingredients
-
1 recipe artisan pizza dough (2 dough balls)
-
1 stick salted butter
-
3 garlic cloves, chopped
-
2 tbsp minced green onion
-
1 tbsp minced rosemary
-
1 tbsp fresh thyme
-
flaky salt, to taste
-
freshly ground black pepper, to taste
-
red pepper flakes, to taste
-
2 tbsp minced chives
Instructions
-
Step 1
Preheat your oven and pizza stone to the highest temperature your oven allows (typically 475-500°F or 245-260°C). -
Step 2
Melt the salted butter in a small saucepan over low heat. Add the chopped garlic and cook for 2-3 minutes until fragrant, but not browned. -
Step 3
Stir in the minced green onion, minced rosemary, and fresh thyme into the butter-garlic mixture. Season with flaky salt and freshly ground black pepper. -
Step 4
Divide the pizza dough into two balls. On a lightly floured surface, stretch or roll each dough ball into your desired pizza shape. -
Step 5
Brush the butter-garlic herb mixture generously over the surface of each pizza dough, leaving a small border for the crust. -
Step 6
Sprinkle with red pepper flakes to your desired level of spice. -
Step 7
Carefully transfer the pizzas to the preheated pizza stone or baking sheet. Bake for 10-12 minutes, or until the crust is golden brown and the butter sauce is bubbling. -
Step 8
Remove from the oven, sprinkle with fresh minced chives, and let cool slightly before slicing and serving.
Important Information
Nutrition Facts (Per Serving)
It is important to consider this information as approximate and not to use it as definitive health advice.
Allergy Information
Please check ingredients for potential allergens and consult a health professional if in doubt.