Easy Bunny Cake- Delicious & Cute Dessert
This Easy Bunny Cake Recipe is about to become your new favorite springtime tradition! There’s something truly magical about a bunny cake, isn’t there? It instantly brings a smile to everyone’s face, from the littlest bakers to the seasoned pros. We all remember those adorable, whimsical creations from childhood, and this recipe captures that same joyful spirit without any fuss. What makes this particular Easy Bunny Cake Recipe so special is its simplicity. It’s designed for busy families and begin extractner bakers, proving that you don’t need to be a pastry chef to create something truly memorable and delicious. Get ready to hop into the kitchen and make this delightful treat that’s perfect for Easter brunch, spring parties, or just a sweet afternoon pick-me-up.
Why You’ll Love This Easy Bunny Cake Recipe:
It’s incredibly simple and quick to make!
Perfect for baking with kids.
Absolutely adorable and festive.
Easy Bunny Cake Recipe
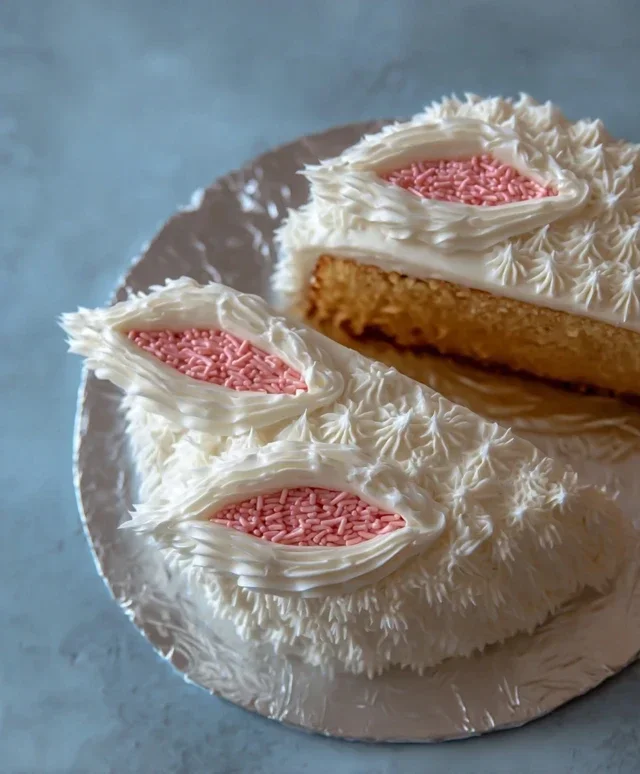
There’s something truly magical about a bunny cake. It instantly evokes thoughts of spring, Easter celebrations, and pure, unadulterated fun. And the best part? You don’t need to be a master baker to create a show-stopping bunny cake that will delight both kids and adults. This recipe is designed to be straightforward, allowing you to assemble a charming bunny with minimal fuss. We’ll be using readily available ingredients and a few simple decorating techniques to bring our fluffy friend to life. Get ready to impress your guests with this adorable and delicious creation!
Ingredients:
Preparing Your Cakes
First things first, ensure your two round cake layers are completely cooled. This is a crucial step to prevent your frosting from melting and sliding off. If you’ve baked your own, let them cool in the pans for about 10-15 minutes before inverting them onto a wire rack to cool thoroughly. If you’re using store-bought cakes, simply unwrap them and ensure they are at room temperature. You can trim any domed tops off your cakes to create a flat surface, which will make assembly much easier. Don’t worry if your cakes aren’t perfectly even; we’ll be covering them with frosting, which is very forgiving!
Assembling the Bunny
This is where the magic starts to happen! We’ll be using the two round cakes to form the body and head of our bunny.
Start by placing one round cake layer on your serving platter or cake stand. This will be the bunny’s body. If you’re using a cake stand, it’s a good idea to put a few small dabs of frosting underneath the cake to anchor it and prevent it from sliding around. Now, generously spread a layer of white frosting over the top of this cake layer. This acts as the “glue” for our second layer and also starts building our fluffy base.
Carefully place the second round cake layer on top of the frosted first layer. This second layer will be the bunny’s head. Position it slightly off-center, towards one edge of the bottom layer, to give the bunny a more natural head placement. You can trim a small sliver off the bottom of the second cake to make it sit more flush if needed, but it’s not essential. Once it’s in place, it’s time to begin extract frosting the entire “bunny” structure.
Using your white frosting and one of your piping bags fitted with a large round tip or a star tip, begin extract frosting the entire cake. You want to create a fluffy, textured effect that mimics bunny fur. Start at the top and work your way down, applying generous dollops of frosting. Don’t aim for perfection here; the more uneven and textured it looks, the more “fur-like” it will appear. Cover the top, sides, and the entire surface of both cake layers, ensuring no cake peeks through. If you prefer a smoother finish, you can use an offset spatula to spread the frosting evenly, but the fluffy texture is quite charming for a bunny!
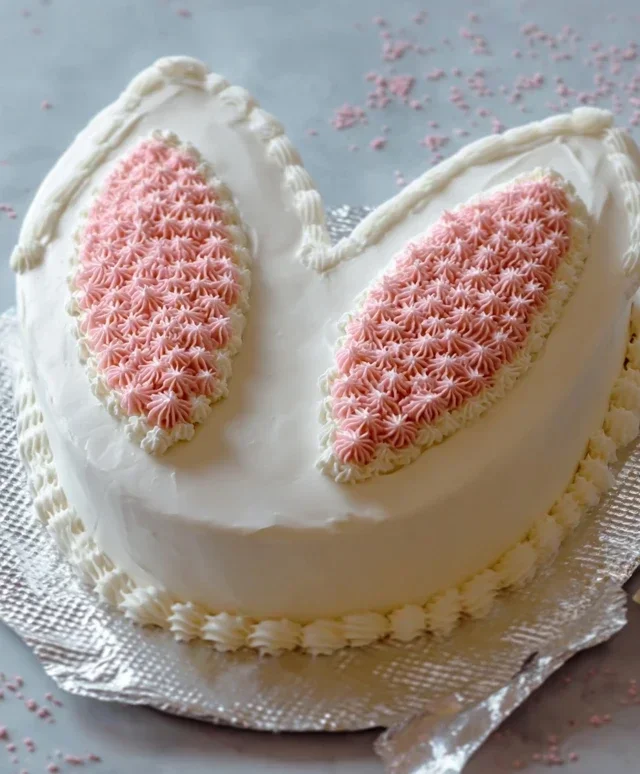
Now for the bunny’s ears! You have a couple of options here. For a super simple approach, you can use two large, curved cookies (like vanilla wafers or shortbread) or even two pieces of fruit leather, and simply insert them into the top of the cake, angled outwards. For a frosted ear effect, you can cut two ear shapes out of leftover cake scraps or even a large marshmallow, and then frost them with white frosting, and then attach them to the top of the bunny’s head. Alternatively, you can shape two oval “ears” directly out of frosting using a piping bag with a large round tip and then create a textured effect on them. For this recipe, we’ll assume you’ve chosen a method that results in two distinct ear shapes that you’ll attach to the cake. Once your ears are ready, gently press them into the top of the cake where the head meets the body, positioning them to look like perky bunny ears.
It’s time to add the sweet details! Take your pink frosting, either in a piping bag with a small round tip or directly from a small bowl if you’re comfortable spooning it carefully, and pipe or carefully spoon two pink “insides” onto your white frosting ears. Then, using your chocolate icing or melted chocolate in a piping bag with a very fine tip (or even a toothpick dipped in chocolate), draw two small dots for the bunny’s eyes and a little nose. For a classic bunny nose, use a jellybean or a colorful round candy. Gently press it into the center of the chocolate “mouth” area. You can also use the chocolate to draw a little mouth, perhaps with a tiny curve extending downwards from the nose. For added flair, you can sprinkle a few extra jellybeans or candies around the base of the cake or even strategically place them as if the bunny is nibbling on them.
Finishing Touches
Once all your decorations are in place, take a step back and admire your creation! You’ve just made an incredibly cute and delicious bunny cake. You can add a few more decorative touches if you like, such as piped “bow” on the bunny’s neck with the pink frosting, or even some green frosting around the base of the cake to represent grass. This bunny cake is perfect for Easter brunches, birthday parties, or just a fun afternoon baking project. Enjoy every bite of your adorable, homemade bunny!
Conclusion:
And there you have it – a delightfully simple and utterly adorable Easy Bunny Cake Recipe perfect for spring celebrations, Easter, or just because! This recipe truly shines because it’s achievable for bakers of all skill levels, with clear steps and minimal fuss. The joy of creating something so charming from scratch, especially with loved ones, is truly rewarding. Imagin extracte the smiles when you unveil this fluffy bunny masterpiece!
This versatile cake is wonderful served simply with a dusting of powdered sugar, or you can get creative with frosting. A classic buttercream in pastel colors, a light cream cheese frosting, or even a simple glaze would be divine. For extra flair, consider decorating with fresh berries, edible flowers, or even a scattering of shredded coconut for a fluffy tail.
Don’t be afraid to experiment! You can add a touch of almond extract to the batter for a subtle nutty flavor, or even tint the cake batter a soft pink for an internal surprise. And for those who love a bit of color, try using food coloring to create a rainbow swirl inside. I truly encourage you to give this Easy Bunny Cake Recipe a try; it’s guaranteed to bring a little extra sweetness and fun to your day.
Frequently Asked Questions:
Can I make this cake ahead of time?
Absolutely! You can bake and cool the cake layers a day in advance. Once completely cooled, wrap them tightly in plastic wrap and store at room temperature. Frosting the cake the day you plan to serve it will ensure the freshest presentation, but the baked cake itself holds up wonderfully.
What kind of frosting works best for decorating the bunny?
A sturdy buttercream frosting is ideal for shaping and decorating the bunny. It holds its form well, making it easier to create the ears, face, and fluffy texture. A cream cheese frosting can also work, but you might need to chill it thoroughly to achieve a good consistency for piping. Remember to have some extra for those cute bunny whiskers!
Easy Bunny Cake Recipe
A simple and fun bunny cake perfect for Easter or any celebration, made with two round cake layers and decorated with frosting and candies.
Ingredients
-
Two round cake layers (use one cake mix or your favorite homemade recipe)
-
White frosting (ready-made or your favorite homemade recipe)
-
Pink frosting (or use pink gel food coloring on white frosting)
-
Chocolate icing or melted chocolate for details
-
Jellybeans or colorful round candies
-
Piping bags
Instructions
-
Step 1
Bake your two round cake layers according to package directions or your favorite recipe. Let them cool completely. -
Step 2
Place one cake layer on your serving platter. Frost the top with a generous amount of white frosting. -
Step 3
Carefully place the second cake layer on top of the frosted first layer. -
Step 4
Crumb coat the entire cake with a thin layer of white frosting. Chill for about 15-20 minutes. -
Step 5
Apply a final, smooth layer of white frosting to the entire cake. -
Step 6
Using pink frosting and a piping bag with a round tip, pipe two bunny ears on top of the cake, angling them slightly outwards. -
Step 7
Use chocolate icing or melted chocolate to pipe a small nose and two eyes for the bunny. -
Step 8
Decorate the bunny’s face and around the base of the cake with jellybeans or colorful round candies.
Important Information
Nutrition Facts (Per Serving)
It is important to consider this information as approximate and not to use it as definitive health advice.
Allergy Information
Please check ingredients for potential allergens and consult a health professional if in doubt.