Easy Creamy Banana Pudding Recipe-Taste So Good
Banana pudding is more than just a dessert; it’s a warm hug in a bowl, a nostalgic trip back to grandma’s kitchen, and a guaranteed crowd-pleaser. There’s something undeniably magical about the way soft, sweet banana slices meld with creamy custard and delicate vanilla wafers. This beloved classic, banana pudding, has a way of bringin extractg smiles to faces of all ages, conjuring up memories of lazy summer afternoons and special family gatherings. What makes this particular banana pudding so special? It’s the perfect balance of textures – the tender bananas, the velvety smooth custard, and the satisfying crunch of the wafers that soften just enough to become a delightful part of the whole. It’s simple, elegant, and utterly irresistible.
Why Banana Pudding Reigns Supreme
A Taste of Comfort and Joy
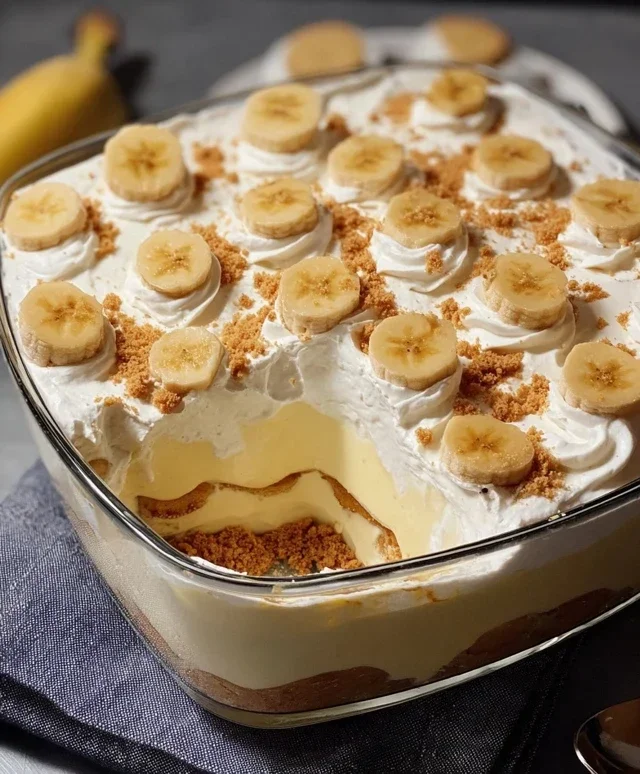
Banana Pudding
There’s something undeniably comforting and nostalgic about a classic banana pudding. It’s a dessert that evokes childhood memories, family gatherings, and those moments of pure, unadulterated sweetness. This recipe takes that beloved flavor profile and simplifies it, making it incredibly easy to whip up a crowd-pleasing treat that will have everyone asking for seconds. The creamy, custardy layers, the sweet crunch of vanilla wafers, and the fresh, soft slices of banana create a symphony of textures and tastes that’s simply irresistible. Whether you’re a seasoned baker or a kitchen novice, this recipe is designed to be foolproof and delicious.
Ingredients:
Instructions:
Prepare the Pudding Base:
In a large mixing bowl, combine the contents of the instant vanilla pudding mix with the cold milk. This is where the magic begin extracts! Whisk vigorously for about 2 minutes, or until the pudding mixture starts to thicken. It’s crucial to use cold milk here; warm milk will prevent the pudding from setting properly and can result in a runny dessert. Once it’s thickened, gradually whisk in the sweetened condensed milk and the vanilla extract. The sweetened condensed milk adds a rich, decadent sweetness and a wonderfully smooth texture that you just can’t get from regular milk alone. Keep whisking until everything is thoroughly combined and the mixture is smooth and glossy. This forms the luscious, creamy custard layer of our pudding.
Incorporate the Whipped Topping:
Now it’s time to lighten and fluff up our pudding base. Gently fold in the thawed whipped topping into the pudding mixture. Use a spatula or a large spoon for this step. The key here is to fold rather than to stir or beat vigorously. This technique preserves the airiness of the whipped topping, which will contribute to the overall light and fluffy texture of the finished pudding. Continue to fold until no streaks of whipped topping are visible and the mixture is uniform in color and consistency. This step transforms the dense pudding into a cloud-like delight. Be patient and ensure it’s fully incorporated for that signature creamy mouthfeel.
Assemble the Layers:
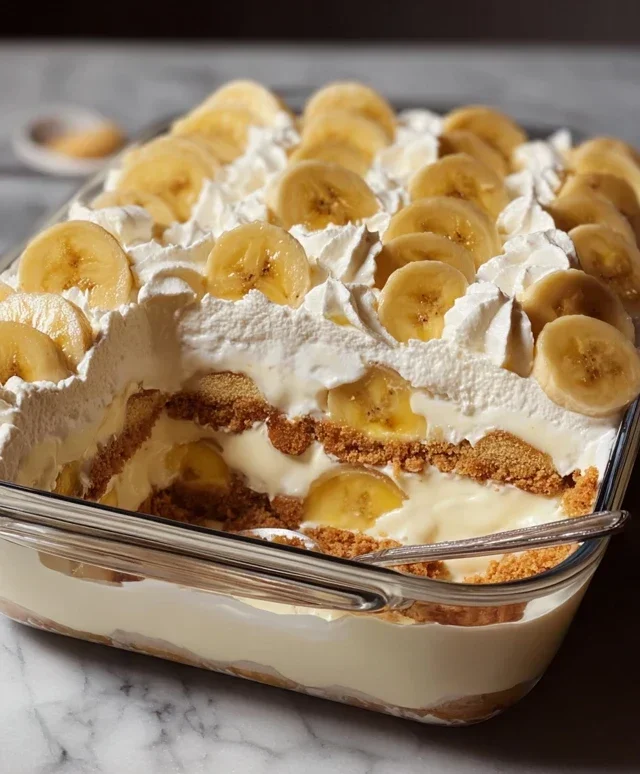
Now comes the fun part – building our beautiful banana pudding! You’ll want to have your dessert dish ready. A clear glass dish, like a 9×13 inch baking dish or a trifle bowl, works wonderfully because it allows you to see those gorgeous layers. Begin extract by placing a single layer of vanilla wafers at the bottom of your dish. Don’t worry if there are small gaps; they will soften and meld together beautifully as the pudding sets. Next, arrange a layer of your sliced ripe bananas over the vanilla wafers. Make sure the banana slices are evenly distributed. You want that delightful banana flavor in every bite.
Continue Layering and Chilling:
Now, spoon about half of the prepared pudding mixture evenly over the banana and wafer layer. Spread it gently to cover the bananas completely. Repeat the layering process: another layer of vanilla wafers, followed by a layer of sliced bananas, and then the remaining pudding mixture. Try to make the top layer of pudding as smooth as possible. Once assembled, cover the dish tightly with plastic wrap. It’s essential to prevent a skin from forming on the pudding and to keep it fresh. Place the covered dish in the refrigerator and let it chill for at least 4 hours, but preferably overnight. This chilling time is crucial for the flavors to meld together and for the pudding to set to its perfect consistency. The vanilla wafers will soften and absorb some of the pudding, creating a delightful soft cookie texture.
Serve and Enjoy:
After the pudding has had ample time to chill and set, it’s ready to be served! You can garnish the top with a few extra vanilla wafers or some reserved banana slices if you like. Spoon generous portions into bowls. This banana pudding is a delightful dessert on its own, but it’s also wonderful served with a dollop of extra whipped cream or a sprinkle of toasted nuts for added texture. The combination of soft bananas, creamy pudding, and softened wafers is simply divine. It’s a dessert that’s perfect for any occasion, from a casual weeknight treat to a special celebration. The simplicity of the ingredients allows the natural flavors to shine through, creating a dessert that is both sophisticated and utterly comforting.
Conclusion:
There you have it – a truly delightful and classic banana pudding recipe that’s sure to become a family favorite. The magic of this dessert lies in its simple yet harmonious blend of creamy custard, tender bananas, and crisp vanilla wafers. It’s incredibly satisfying without being overly complicated, making it perfect for both novice bakers and seasoned pros looking for a comforting treat. This banana pudding is a testament to how a few humble ingredients can come together to create something truly special and memorable.
I love serving this banana pudding chilled, straight from the refrigerator, where the flavors have had time to meld beautifully. It’s fantastic on its own, but also pairs wonderfully with a scoop of vanilla ice cream or a dollop of fresh whipped cream. Don’t hesitate to get creative with variations! Consider adding a sprinkle of toasted coconut for a tropical twist, or a swirl of caramel sauce for an extra layer of sweetness. You can even experiment with different cookies, like shortbread, for a subtle change in texture and flavor.
I truly encourage you to give this recipe a try. It’s a rewarding baking experience that yields a dessert everyone will adore. So gather your ingredients, follow these steps, and prepare to be amazed by the simple, sweet perfection of homemade banana pudding!
Frequently Asked Questions:
Can I make this banana pudding ahead of time?
Absolutely! In fact, I highly recommend making it at least a few hours, or even a day, in advance. This allows the flavors to meld together beautifully and the wafers to soften just enough, creating that perfect pudding consistency. Just ensure it’s covered tightly and stored in the refrigerator.
What kind of bananas should I use?
For the best flavor and texture, use ripe, but not overly mushy, bananas. They should have a few brown spots, indicating they are sweet and flavorful, but still firm enough to hold their shape when sliced. Avoid green bananas, as they won’t be sweet enough, and overly soft bananas that will turn mushy in the pudding.
How do I prevent the wafers from getting too soggy?
The key is timing! If you’re making it ahead, layering the wafers just before serving can help, or you can add a slightly thicker layer of custard to help them absorb without disintegrating completely. Some people also prefer to add the wafers in layers throughout the pudding rather than just on top, which distributes the moisture more evenly.
Classic Banana Pudding
A simple and delicious layered banana pudding featuring creamy pudding, ripe bananas, and vanilla wafers.
Ingredients
-
1 (3.4 oz) box instant vanilla pudding mix
-
2 cups cold milk
-
1 (14 oz) can sweetened condensed milk
-
1 tsp vanilla extract
-
1 (8 oz) tub whipped topping, thawed
-
4-5 ripe bananas, sliced
-
1 (11 oz) box vanilla wafers
Instructions
-
Step 1
In a large bowl, whisk together the instant vanilla pudding mix and cold milk until well combined and smooth. -
Step 2
Gradually whisk in the sweetened condensed milk and vanilla extract until fully incorporated. -
Step 3
Gently fold in the thawed whipped topping until no streaks remain, creating a light and airy pudding mixture. -
Step 4
Layer a small amount of vanilla wafers at the bottom of a serving dish. Top with a layer of sliced bananas. -
Step 5
Spoon a generous amount of the pudding mixture over the bananas and wafers. Repeat layers until all ingredients are used, ending with a layer of pudding. -
Step 6
Chill in the refrigerator for at least 30 minutes before serving to allow flavors to meld and pudding to set.
Important Information
Nutrition Facts (Per Serving)
It is important to consider this information as approximate and not to use it as definitive health advice.
Allergy Information
Please check ingredients for potential allergens and consult a health professional if in doubt.