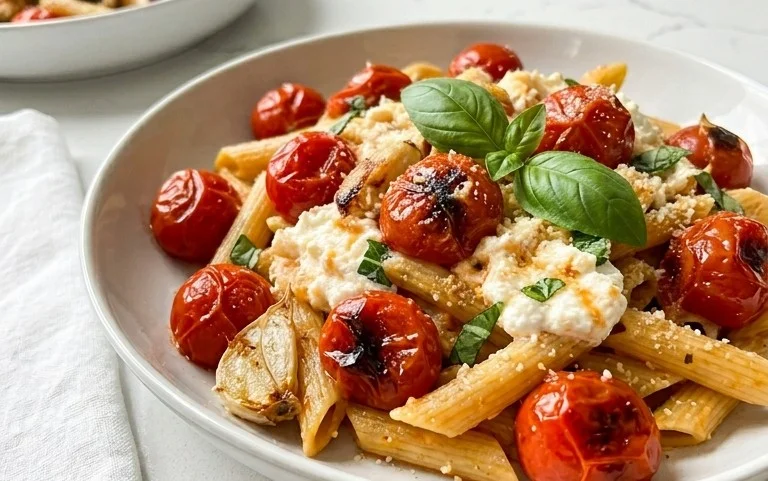
Easy Sweet Potato Gnocchi Recipe – Delicious Dinner
Sweet potato gnocchi, oh how I adore this dish! There’s something truly magical about transforming humble sweet potatoes into pillowy, cloud-like dumplings. Forget those heavy, often-rubbery gnocchi of the past; these are a revelation. People gravitate towards sweet potato gnocchi for a multitude of reasons. First, the inherent sweetness of the potato lends a delightful, subtle flavor that perfectly balances savory sauces. Second, they offer a beautiful, vibrant color that instantly brightens any plate. What truly sets these sweet potato gnocchi apart is their incredible texture – tender, melt-in-your-mouth goodness with just the right amount of chew. They’re surprisingly forgiving to make, and the satisfaction of creating these little gems from scratch is immense. Get ready to fall in love with a new favorite comfort food!

Sweet Potato Gnocchi
There’s something incredibly comforting about a bowl of soft, pillowy gnocchi. And when that gnocchi is made with the natural sweetness of sweet potatoes, it elevates the humble dumpling to a whole new level of deliciousness. These Sweet Potato Gnocchi are surprisingly easy to make, and the vibrant orange hue is a feast for the eyes. They pair beautifully with a simple sage butter sauce, a hearty marinara, or even just a drizzle of olive oil and a sprinkle of Parmesan. Get ready to impress yourself and your loved ones with this delightful homemade pasta!
Ingredients:
Making the Sweet Potato Base
The first step in creating our fantastic gnocchi is preparing the sweet potatoes. This is where the magic begin extracts!
1. Roast or Steam the Sweet Potatoes: For the best flavour and texture, I highly recommend roasting your sweet potatoes. Preheat your oven to 200°C (180°C fan/400°F). Pierce the sweet potatoes several times with a fork and place them directly on the oven rack or on a baking sheet lined with parchment paper. Roast for about 45-60 minutes, or until they are very tender when pierced with a knife. Alternatively, you can steam them by placing them in a steamer basket over boiling water for about 30-40 minutes, until fork-tender. Roasting concentrates the sugars in the sweet potato, leading to a richer flavour and a less watery puree, which is ideal for gnocchi.
2. Mash and Cool the Sweet Potato: Once the sweet potatoes are cooked and tender, let them cool slightly until they are comfortable to handle. Carefully slice them in half lengthwise and scoop out the flesh into a bowl. Discard the skins. Mash the sweet potato flesh thoroughly until it’s smooth and free of lumps. A potato masher or a fork works perfectly for this. If you have a food mill, that’s also an excellent tool to get a very fine mash. It’s crucial that the mashed sweet potato is as dry as possible. If you notice any excess moisture, you can spread it thinly on a plate and let it air dry for a bit, or gently press it with paper towels. Allow the mashed sweet potato to cool down completely before proceeding. Warm potato will make the dough sticky and difficult to work with. You can even refrigerate it for a short while to ensure it’s thoroughly cool.
Forming the Gnocchi Dough
Now that our sweet potato base is ready, it’s time to bring it all together into a pliable dough.
3. Combine Sweet Potato and Flour: Once the mashed sweet potato is completely cool, add the 180g of plain white flour (or your preferred gluten-free blend) to the bowl. If you’re using salt, add it now too. Begin extract to gently mix the flour into the sweet potato. You can use a fork to start, and then switch to your hands as the mixture comes together. The goal is to create a soft, slightly sticky dough. The exact amount of flour needed can vary depending on the moisture content of your sweet potatoes. Start with the measured amount, and if the dough feels too wet and sticky, gradually add a little more flour, a tablespoon at a time, until it’s manageable. Be careful not to overwork the dough, as this can lead to tough gnocchi. We’re aiming for a texture similar to Play-Doh – soft but not sticky to the touch.
Shaping the Gnocchi
This is the fun, creative part! Shaping the gnocchi is a satisfying process that results in beautifully formed dumplings.
4. Shape the Gnocchi: Lightly flour a clean work surface. Take about a quarter of the dough and gently roll it into a long, snake-like rope, about 1.5-2 cm (¾ inch) in diameter. Use a sharp knife or a bench scraper to cut the rope into small, bite-sized pieces, about 2 cm (¾ inch) long. If you want to create the traditional gnocchi ridges (which help sauce cling to them), you have a couple of options. You can gently roll each piece of dough down the tines of a fork, pressing with your thumb to create a slight indentation. Alternatively, you can use a gnocchi board for a more uniform look. If you’re short on time or prefer a simpler approach, the cut pieces on their own are perfectly delicious. As you shape the gnocchi, place them on a lightly floured baking sheet or tray in a single layer, ensuring they don’t touch each other. This prevents them from sticking together. You can also cover them with a clean kitchen towel to prevent them from drying out while you shape the rest of the dough. Repeat this process with the remaining dough until all the gnocchi are formed.
Cooking and Serving
The moment of truth! Boiling these little beauties is quick and easy.
5. Boil and Serve: Bring a large pot of generously salted water to a rolling boil. Carefully drop the gnocchi into the boiling water, working in batches to avoid overcrowding the pot. Don’t stir them immediately; let them sink to the bottom. After a minute or two, they will start to float to the surface. Once they float, let them cook for another 1-2 minutes. They are ready when they are plump and have risen to the top. Using a slotted spoon, carefully remove the cooked gnocchi from the water. You can then toss them immediately with your desired sauce. For a classic flavour pairing, gently heat some butter in a skillet and add fresh sage leaves. Once the butter is melted and fragrant, add the cooked gnocchi and toss them to coat. A sprinkle of grated Parmesan cheese finishes this simple yet elegant dish beautifully. Enjoy your delicious homemade Sweet Potato Gnocchi!

Conclusion:
And there you have it – your guide to creating delicious, homemade sweet potato gnocchi! This recipe is fantastic because it transforms humble sweet potatoes into pillowy, flavorful dumplings that are both comforting and surprisingly elegant. The natural sweetness of the potato shines through, making them a delightful alternative to traditional potato gnocchi. They’re perfect for a cozy weeknight dinner or an impressive dish to share with loved ones. Don’t be intimidated; the process is quite straightforward and incredibly rewarding. I truly encourage you to give these a try – you might be surprised at how easy and enjoyable making gnocchi from scratch can be!
For serving, I love tossing them with a sage brown butter sauce, a creamy pesto, or even a simple marinara. They also pair wonderfully with a sprinkle of toasted walnuts or a dollop of ricotta. If you’re feeling adventurous, consider adding a pinch of nutmeg or cinnamon to the dough for a warmer flavor profile, or even puréeing in a bit of roasted garlic for an extra savory kick.
Frequently Asked Questions:
Why are my gnocchi sticky?
Stickiness often comes from using too much flour. Start with the minimum amount suggested and add more only if absolutely necessary, until the dough is soft but not overly sticky. Overworking the dough can also develop gluten, leading to toughness and stickiness.
Can I make sweet potato gnocchi ahead of time?
Absolutely! You can prepare the dough, shape the gnocchi, and then refrigerate them on a floured baking sheet for a few hours. For longer storage, freeze them in a single layer until solid, then transfer to a freezer-safe bag. Cook from frozen, adding a few extra minutes to the boiling time.
Sweet Potato Gnocchi
Delicious and tender sweet potato gnocchi, easily made at home. Perfect as a vegetarian main course or side dish.
Ingredients
-
2 Sweet Potatoes ((680-700g))
-
180g Plain white flour + more for dusting ((Roughly 1 ½ cups) I use gluten-free)
-
Pinch Salt ((optional))
-
1 tablespoon olive oil
-
1/4 teaspoon nutmeg
-
2 tablespoons fresh sage leaves, chopped
Instructions
-
Step 1
Preheat oven to 400°F (200°C). Pierce sweet potatoes with a fork and bake for 45-60 minutes, or until very tender. Let cool slightly, then peel. -
Step 2
Mash the cooked sweet potato until smooth. Measure out approximately 1 cup (about 200-220g) of mashed sweet potato. -
Step 3
On a clean surface, combine the mashed sweet potato, 180g plain white flour, pinch of salt (if using), and 1/4 teaspoon nutmeg. Mix gently until a soft dough forms. Avoid overworking. -
Step 4
Lightly flour your surface and hands. Divide the dough into manageable portions. Roll each portion into a long rope, about 3/4 inch thick. Cut the ropes into 1-inch pieces. -
Step 5
For classic gnocchi shape, you can gently roll each piece down the tines of a fork with your thumb, or leave them as is. -
Step 6
Bring a large pot of salted water to a rolling boil. Carefully add gnocchi in batches. Cook until they float to the surface, about 2-3 minutes. -
Step 7
While gnocchi cooks, heat 1 tablespoon olive oil in a large skillet over medium heat. Add chopped sage and cook until fragrant. Remove cooked gnocchi from water with a slotted spoon and add directly to the skillet. Toss to coat and lightly brown for 1-2 minutes.
Important Information
Nutrition Facts (Per Serving)
It is important to consider this information as approximate and not to use it as definitive health advice.
Allergy Information
Please check ingredients for potential allergens and consult a health professional if in doubt.