French Macaron Recipe-Perfectly Sweet Delicate Bites
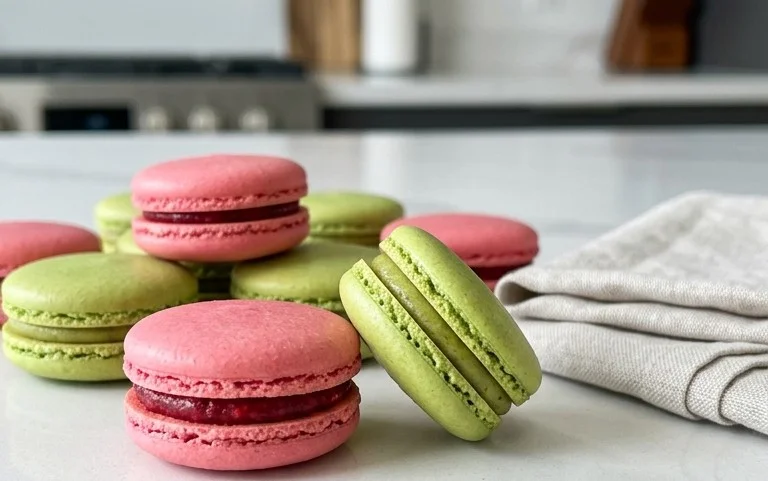
French macarons are more than just a delicate pastry; they’re a tiny, edible work of art. That crisp shell, yielding to a soft, chewy interior, sandwiching a luscious filling – it’s a textural symphony that has captivated taste buds worldwide. But what is it about these petite cookies that inspires such devotion? Perhaps it’s their inherent elegance, the explosion of vibrant colors, or the sheer joy of biting into a perfectly crafted French macaron. They feel special, a treat reserved for celebrations or moments when you want to indulge in something truly exquisite. Making them at home might seem daunting, a culinary Everest to climb, but trust me, with the right guidance, you can absolutely achieve those coveted smooth shells and perfectly piped little domes. This recipe is designed to demystify the process, guiding you step-by-step to creating your own breathtaking batch of French macarons that will impress everyone, including yourself.
French Macaron Recipe
The French macaron, a delicate sandwich cookie with a crisp shell and a chewy interior, has captivated bakers worldwide with its elegant appearance and delightful taste. While they may seem intimidating, with a bit of patience and attention to detail, you can master the art of creating these exquisite treats in your own kitchen. This recipe breaks down the process into manageable steps, ensuring a successful outcome.
Ingredients:
Preparing Your Dry Ingredients
The foundation of a great macaron lies in the precision of its dry ingredients. It’s crucial to use super-fine almond flour. If you can’t find it pre-ground, you can process regular almond flour in a food processor until very fine, then sift it. Sifting is a non-negotiable step. It removes any larger almond pieces and clumps, which will result in a smooth, even macaron shell. I like to sift the almond flour and powdered sugar together at least twice. This ensures they are thoroughly combined and aerated, which helps prevent the macarons from developing hollow spots. Add the 1/4 teaspoon of salt to this mixture and give it a final whisk to ensure everything is evenly distributed. Set this aside.
Making the Meringue
This is arguably the most critical stage in macaron making. You’ll need a clean, grease-free bowl and whisk attachment for your stand mixer. Add your 120 grams of room-temperature egg whites to the bowl. Room temperature egg whites whip up to a greater volume and stability than cold ones, so plan ahead. Begin extract whisking the egg whites on medium speed until they become foamy, like the lather on a bar of soap. Gradually add the 60 grams of granulated sugar, a tablespoon at a time, while the mixer is still running. Continue to beat the egg whites on medium-high speed until you achieve stiff, glossy peaks. This means that when you lift the whisk, the meringue will stand straight up without drooping. If you can hold the bowl upside down over your head without the meringue falling out, you’ve likely reached the correct stage – but I recommend starting with a visual cue! Now is the time to incorporate your food coloring and vanilla extract. Add them with the last minute of whisking, ensuring the color is evenly distributed and no streaks remain. The meringue should be a vibrant, uniform color.
The Macaronage: Folding is Key
This is where the magic happens and where many bakers falter. The macaronage is the process of folding the dry ingredients into the meringue. You’ll want to add about one-third of your sifted dry ingredients to the meringue. Using a spatula, gently fold the dry ingredients into the wet. Don’t overmix at this stage; just aim to incorporate most of the dry ingredients. Add the remaining dry ingredients in two more additions, continuing to fold. The goal is to achieve a batter that flows like molten lava. When you lift your spatula, the batter should fall off in a thick ribbon, and the ribbon should slowly melt back into the rest of the batter within about 20-30 seconds. If the batter is too stiff, your macarons will be cracked and bumpy. If it’s too thin, they will spread too much and be flat. This is where practice and observation are essential. It’s better to err on the side of slightly overmixing than undermixing.
Piping and Resting
Once your batter has reached the perfect consistency, it’s time to pipe. Transfer the macaron batter into a piping bag fitted with a round tip (about 1/2 inch). Line baking sheets with parchment paper or silicone baking mats. Pipe small, uniform circles of batter onto the prepared baking sheets, leaving about an inch of space between each one. You can trace circles on the parchment paper as a guide if you’re new to this. Once you’ve piped your macarons, firmly tap the baking sheets on the counter several times. This action helps to release any air bubbles trapped in the batter, which can cause cracks during baking. After tapping, let the piped macarons rest at room temperature for at least 30 minutes, or until a skin forms on the surface. You should be able to gently touch the surface without any batter sticking to your finger. This resting period is crucial for developing the iconic “feet” of the macaron.
Baking and Assembling
Preheat your oven to 300°F (150°C). Bake the macarons for 12-15 minutes, or until they have developed their characteristic “feet” and the shells are firm to the touch. The exact baking time will vary depending on your oven. You’ll know they are done when the shells can be gently lifted off the parchment paper without sticking. Once baked, remove the baking sheets from the oven and let the macarons cool completely on the sheets before attempting to move them. This is important because they will be very delicate when hot. Once cooled, carefully peel the macaron shells off the parchment paper. Match up similarly sized shells and then fill them with your chosen filling, such as the vanilla buttercream. Gently press the top shell onto the filling until it spreads to the edges. Store your finished macarons in an airtight container in the refrigerator for at least 24 hours before serving. This resting period allows the flavors to meld and the shells to soften slightly, creating that perfect chewy texture. Enjoy your homemade French macarons!
Conclusion:
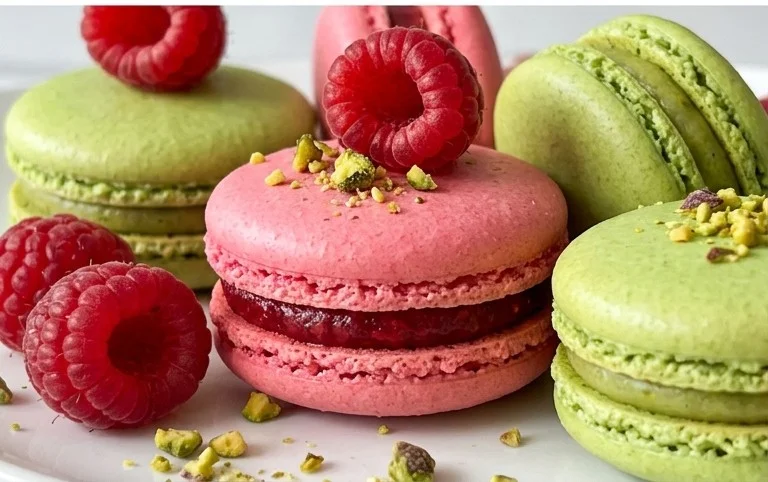
Embarking on the journey to create perfect French macarons might seem daunting, but with this detailed recipe, you’re well-equipped to achieve those delicate, chewy, and utterly delightful little cookies. The magic of this French macaron recipe lies in its balance of simple ingredients transformed through precise technique into something truly special. These are not just desserts; they are edible works of art, perfect for impressing guests, celebrating special occasions, or simply treating yourself to a moment of pure indulgence. Imagin extracte a box filled with vibrant colors and exquisite flavors – it’s a truly rewarding experience!
These versatile treats are wonderful served on their own, as a sophisticated addition to a dessert platter, or even incorporated into larger celebratory cakes. For serving suggestions, think about pairing them with coffee, tea, or a glass of sparkling grape juice. As for variations, the possibilities are endless! Experiment with different food colorings to match your theme, and don’t shy away from unique filling flavors like lavender-honey, salted caramel, or even a spicy chili-chocolate ganache. I highly encourage you to give this French macaron recipe a try. Don’t be discouraged if your first batch isn’t perfect; practice truly makes perfect with these delicate pastries.
Frequently Asked Questions:
Why are my French macarons cracked?
Cracked macaron shells are often a result of oven temperature being too high, not resting the piped batter long enough to form a skin, or over-mixing the meringue. Ensure your oven is accurately calibrated and allow the piped shells to sit at room temperature for 30-60 minutes before baking until a dry skin forms to the touch.
What is the best way to achieve smooth, round French macarons?
Achieving smooth shells requires a well-made meringue, proper macaronage (the folding of dry ingredients into the meringue), and consistent piping. A stable meringue is crucial, and the macaronage technique involves folding just enough until the batter flows like lava. Using a template underneath your parchment paper can also help with uniform size and shape.
Can I make French macarons ahead of time?
Absolutely! French macarons are best made a day or two in advance. This resting period allows the filling to meld with the shells, creating the perfect chewy texture. Store them in an airtight container in the refrigerator.
Classic French Macaron Recipe
A detailed guide to creating delicate and delicious French macarons from scratch, perfect for any occasion.
Ingredients
-
150 grams sifted super-fine almond flour
-
180 grams powdered sugar
-
1/4 teaspoon salt
-
120 grams large egg whites (at room temperature)
-
60 grams granulated sugar
-
4 drops liquid-gel food coloring
-
1 teaspoon pure vanilla extract
-
Vanilla Buttercream Frosting or your choice of filling
Instructions
-
Step 1
Sift together the almond flour, powdered sugar, and salt into a medium bowl. Whisk to combine. Set aside. -
Step 2
In a clean, grease-free bowl, whip the egg whites using an electric mixer on medium speed until frothy. Gradually add the granulated sugar, one tablespoon at a time, increasing the speed to high. Continue whipping until stiff, glossy peaks form. This is your meringue. -
Step 3
Gently fold the food coloring and vanilla extract into the meringue until just combined. Be careful not to overmix. -
Step 4
Add the sifted dry ingredients to the meringue in two additions, folding gently after each addition until a thick, lava-like batter forms. The batter should flow off the spatula in a ribbon and slowly melt back into itself. -
Step 5
Transfer the batter to a piping bag fitted with a round tip. Pipe small, uniform rounds onto baking sheets lined with parchment paper or silicone baking mats. Leave some space between each macaron. -
Step 6
Tap the baking sheets firmly on the counter a few times to release any air bubbles. Let the macarons rest at room temperature for 20-30 minutes, or until a skin forms and they feel dry to the touch. -
Step 7
Preheat your oven to 300°F (150°C). Bake the macarons for 12-15 minutes, or until the tops are firm and the shells lift easily from the parchment. -
Step 8
Let the macarons cool completely on the baking sheets before carefully removing them. Fill with your chosen frosting or filling.
Important Information
Nutrition Facts (Per Serving)
It is important to consider this information as approximate and not to use it as definitive health advice.
Allergy Information
Please check ingredients for potential allergens and consult a health professional if in doubt.