Patriotic Oreo Balls – Easy Red White Blue Dessert
Patriotic Oreo Balls are more than just a treat; they’re a burst of festive flavor and fun that embodies the spirit of celebration. Imagin extracte the delightful crunch of crushed Oreos mingling with creamy goodness, all dipped in vibrant colors that mirror the red, white, and blue of any national holiday. It’s no wonder these easy-to-make delights are a crowd-pleaser, perfect for barbecues, game days, or simply bringin extractg a smile to your loved ones’ faces. What truly makes these Patriotic Oreo Balls special is their incredible versatility and the sheer joy they bring. They’re the perfect canvas for your creativity, allowing you to personalize them for any occasion. Whether you’re hosting a party or just looking for a sweet way to express your national pride, these Patriotic Oreo Balls are guaranteed to be a hit!
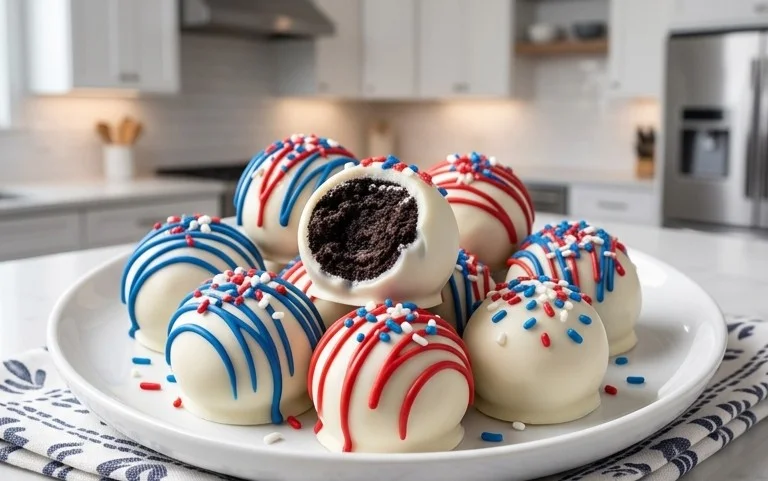
Patriotic Oreo Balls
These Patriotic Oreo Balls are a show-stopping treat that’s surprisingly easy to make and perfect for any holiday celebration, from the Fourth of July to Memorial Day, or even just a fun summer gathering. They’re a delightful blend of rich, creamy, and chocolatey goodness, with a festive flair that’s sure to impress. The vibrant red, white, and blue colors are eye-catching, and the sweet crunch of the Oreos combined with the smooth coating is irresistible. Get ready to wow your friends and family with these crowd-pleasing delights!
Ingredients:
Getting Started: The Oreo Base
The foundation of our delicious Oreo Balls starts with the cookies themselves. For this recipe, we’re using a substantial Family Size package of Oreo Cookies, which is approximately 1 pound and 2.12 ounces. This generous amount ensures you’ll have plenty of cookies to create a good batch of treats. The first crucial step is to crush these cookies into fine crum extractbs. You can achieve this by placing the Oreos in a food processor and pulsing them until they are finely ground. If you don’t have a food processor, don’t worry! You can also place the Oreos in a sturdy resealable plastic bag, seal it tightly, and then use a rolling pin to crush them into crum extractbs. Aim for a consistency that’s as fine as possible, almost like sand. This fine texture is key to achieving a smooth and cohesive Oreo ball mixture. Once you have your cookie crum extractbs, set them aside in a large mixing bowl.
Next, we introduce the creamy element that binds everything together. You’ll need an 8-ounce block of cream cheese, and it’s absolutely essential that it’s softened to room temperature. This is not a step to rush! When cream cheese is at room temperature, it’s pliable and will easily incorporate into the cookie crum extractbs without lumps. If your cream cheese is still cold and firm, it will be difficult to mix evenly, resulting in a less desirable texture for your Oreo balls. To soften it, simply leave it on the counter for about an hour or two, depending on your kitchen’s temperature. Once softened, add the cream cheese to the bowl with the Oreo crum extractbs. Now, using a sturdy spoon or your hands (which are often the best tools for this kind of job!), mix the cream cheese and cookie crum extractbs together thoroughly. You want to combine them until there are no streaks of cream cheese visible and the mixture is uniformly moist and holds together when pressed. It should form a dough-like consistency that you can easily roll into balls.
Forming and Chilling the Balls
With your Oreo and cream cheese mixture combined, it’s time to roll them into balls. The size of your Oreo balls is a matter of personal preference, but a good starting point is to aim for about 1-inch diameter balls. You can use a small cookie scoop to ensure uniformity, or simply roll tablespoon-sized portions between your palms. As you roll each ball, gently press the mixture together to create a firm, compact shape. This prevents the balls from crum extractbling apart after they’re dipped. Arrange the rolled Oreo balls on a baking sheet lined with parchment paper. Parchment paper is a lifesaver here, as it prevents sticking and makes for easy cleanup. Once all the balls are formed, place the baking sheet in the refrigerator for at least 30 minutes. This chilling period is crucial. It allows the cream cheese to firm up, which will make the Oreo balls more stable and easier to dip in the candy melts without them falling apart. The firmer they are, the cleaner your dipped coating will be.
Melting and Dipping Magic
Now for the most colorful part: the candy melts! You’ll need 12 ounces each of red and blue candy melts, and ⅓ cup of Ghirardelli white melting wafers. These are specifically designed for melting and coating, and they set up firm, which is perfect for our Oreo balls. To melt the candy melts and white wafers, you can use a microwave or a double boiler. For microwaving, place each color (red, blue, and white) in separate microwave-safe bowls. Heat them in 30-second intervals, stirring well after each interval, until they are completely smooth and melted. Be patient, as overheating can cause them to seize. If using a double boiler, fill the bottom pot with about an inch of water and bring it to a gentle simmer. Place the candy melts and white wafers in the top pot, ensuring the bottom of the top pot doesn’t touch the simmering water. Stir constantly until smooth.
Once your candy melts are melted and smooth, it’s time to dip! You’ll want to work relatively quickly as the candy melts can start to set. Take one chilled Oreo ball at a time and gently dip it into one of the melted candy colors. A toothpick or a dipping fork is your best friend here. Insert a toothpick into the top of an Oreo ball and fully immerse it in the melted candy. Allow any excess candy to drip back into the bowl. Carefully place the dipped Oreo ball back onto the parchment-lined baking sheet. Repeat this process, dipping some balls in red, some in blue, and some in white. For a fun patriotic swirl effect, you can dip a ball halfway in one color, let it set slightly, and then dip the other half in a contrasting color. Or, for a classic look, create red and white stripes by drizzling melted white chocolate over red-dipped balls (or vice-versa) once the first layer has set.
Adding the Finishing Touches: Stars and Stripes
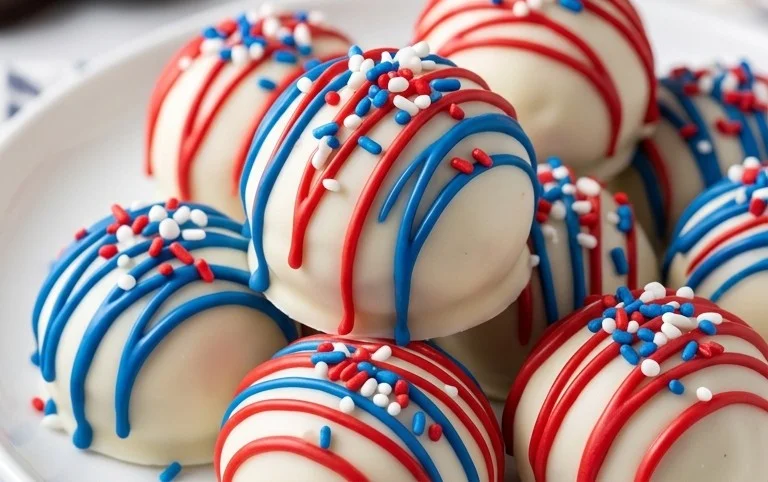
To really amp up the patriotic theme, we’re adding some adorable white star confetti sprinkles! While the dipped candy coating is still wet, gently sprinkle the white stars over the tops of your red and blue Oreo balls. The wet candy will help the sprinkles adhere. You can be as precise or as whimsical as you like with your sprinkling. For a more uniform look, press the stars lightly onto the surface. If you want a more scattered effect, a gentle shake of the sprinkles from a little height will do the trick. You can also create red, white, and blue swirls by using a piping bag with a small round tip to drizzle melted white chocolate over the red and blue dipped balls, or drizzle red and blue over the white ones. For the white chocolate, you might need to add a tiny bit of vegetable oil (about 1/4 teaspoon per cup of wafers) to ensure a smooth, dippable consistency.
Once all your Oreo balls are dipped and decorated, it’s essential to let them set completely. You can leave them at room temperature if your environment is cool, or place them back in the refrigerator for about 15-20 minutes to speed up the hardening process. Once the candy coating is firm to the touch, your Patriotic Oreo Balls are ready to be enjoyed! They store beautifully in an airtight container in the refrigerator for up to a week, making them a great make-ahead treat for any event. These are guaranteed to be a hit, offering a delightful burst of flavor and a festive burst of color!
Conclusion:
And there you have it – a truly delightful and incredibly easy way to whip up some festive cheer with these Patriotic Oreo Balls! I absolutely love this recipe because it’s so forgiving, remarkably quick, and the results are always a showstopper. Whether you’re hosting a backyard BBQ, attending a Fourth of July potluck, or simply want to add a touch of red, white, and blue to your dessert table, these no-bake treats are guaranteed to be a hit. They’re perfect for satisfying that sweet craving without any fuss, making them an ideal activity for kids and adults alike. Don’t hesitate to give these a try; you won’t be disappointed!
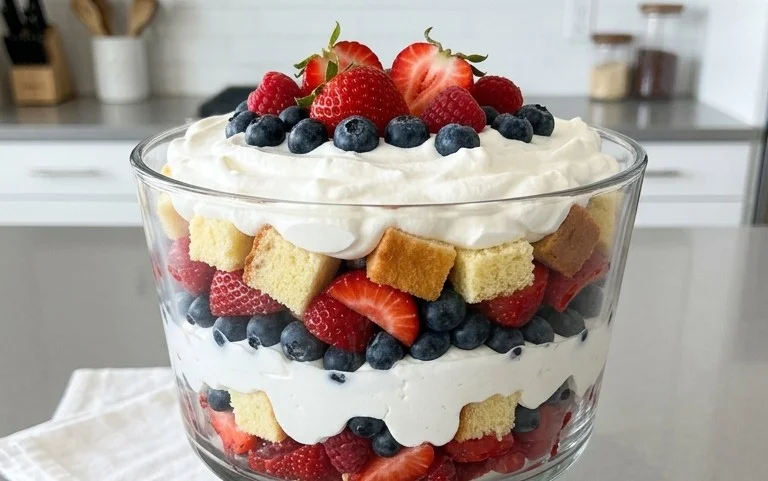
For serving, these Patriotic Oreo Balls are fantastic on their own, but they also look stunning arranged on a platter with fresh berries like strawberries and blueberries. They make for a wonderful addition to a dessert bar or as a sweet party favor. You can even package them in cellophane bags tied with festive ribbon for a lovely take-home treat.
If you’re feeling adventurous, consider adding a touch of edible glitter for extra sparkle or experimenting with different flavor extracts in your cream cheese mixture. Perhaps a hint of almond or vanilla would complement the chocolatey goodness beautifully. The possibilities are endless for personalizing your own version of this versatile treat.
Frequently Asked Questions:
How long do these Patriotic Oreo Balls last?
You can store your finished Patriotic Oreo Balls in an airtight container in the refrigerator for up to a week. They tend to become even more flavorful as the ingredients meld together. Just let them sit at room temperature for about 10-15 minutes before serving for the best texture.
Can I make these ahead of time?
Absolutely! These are a fantastic make-ahead dessert. You can prepare them a day or two in advance and store them in the refrigerator. This is especially handy when you’re planning for a larger event and want to reduce stress on the day itself. Just remember to allow them to soften slightly before enjoying.
What if I don’t have red, white, and blue sprinkles?
No problem at all! You can get creative with other toppings. Consider using white chocolate chips, mini chocolate chips, crushed pretzels for a salty contrast, or even a drizzle of contrasting colored candy melts. The key is to have fun and make them visually appealing in a way that makes you happy!
Patriotic Oreo Balls
Festive and easy-to-make Oreo balls with a patriotic red, white, and blue theme, perfect for holidays and celebrations.
Ingredients
-
1 lb 2.12 oz Family Size package Oreo Cookies
-
8 ounce block cream cheese (softened to room temperature)
-
12 ounce bag red candy melts
-
12 ounce bag blue candy melts
-
⅓ cup Ghirardelli white melting wafers
-
White star confetti sprinkles for topping
Instructions
-
Step 1
Crush the entire package of Oreo cookies into fine crumbs using a food processor or by placing them in a zip-top bag and crushing with a rolling pin. -
Step 2
In a large bowl, combine the Oreo cookie crumbs and softened cream cheese. Mix until well combined and a dough-like consistency forms. -
Step 3
Roll the mixture into small balls, about 1 inch in diameter. Place the balls on a baking sheet lined with parchment paper and freeze for at least 15-20 minutes to firm up. -
Step 4
Melt the red and blue candy melts separately according to package directions. Melt the Ghirardelli white melting wafers separately. -
Step 5
Dip the chilled Oreo balls into the melted candy melts, ensuring they are fully coated. Use a fork to lift them out and allow excess to drip off. -
Step 6
Place the dipped balls back on the parchment-lined baking sheet. Immediately sprinkle with white star confetti before the candy coating sets. -
Step 7
Allow the candy coating to set completely at room temperature or in the refrigerator. Store in an airtight container.
Important Information
Nutrition Facts (Per Serving)
It is important to consider this information as approximate and not to use it as definitive health advice.
Allergy Information
Please check ingredients for potential allergens and consult a health professional if in doubt.