Brown Butter Brookies – Decadent Chocolate Chip Brownie Cookie
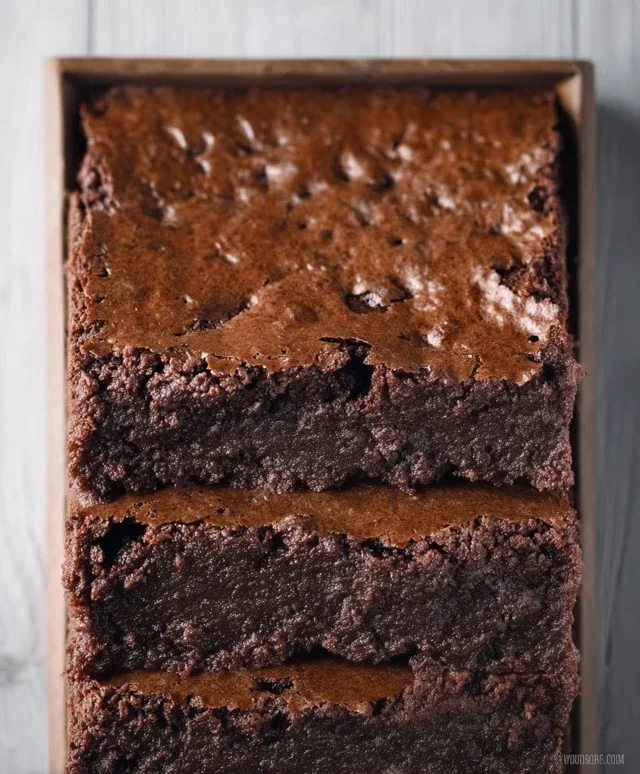
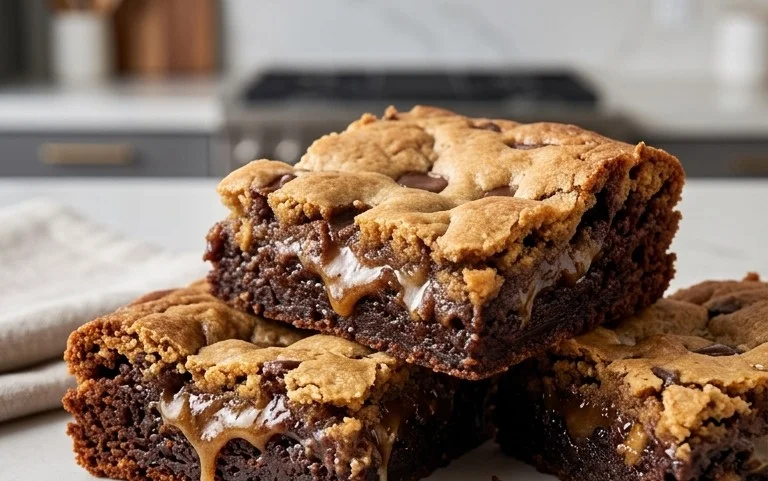
Brown Butter Brookies are a dessert revelation, a harmonious marriage of two beloved classics that creates something truly extraordinary. If you’ve ever found yourself torn between the chewy indulgence of a perfect brownie and the soft, golden goodness of a chocolate chip cookie, then you, my friend, are about to embark on a culinary adventure you won’t soon forget. We’re talking about a bottom layer of fudgy, rich brownie, swirled and topped with a sweet, slightly crisp chocolate chip cookie dough. The secret weapon in this flavor explosion? Nutty, deeply caramelized brown butter, which infuses every bite with an unparalleled depth of flavor. It’s this magical touch that elevates these brown butter brookies from simply delicious to downright addictive, making them the ultimate crowd-pleaser and a guaranteed way to impress anyone with a sweet tooth. Prepare to fall in love.
Brown Butter Brookies
Get ready to experience a dessert revelation! These Brown Butter Brookies are the ultimate fusion of rich, fudgy brownies and decadent, chewy chocolate chip cookies, elevated by the nutty, caramelized magic of brown butter. If you’ve ever struggled to choose between a brownie and a cookie, your dilemma is officially over. This recipe brings the best of both worlds together in a single, glorious treat. The secret weapon here is the brown butter, which adds a layer of complex flavor that store-bought butter simply can’t replicate. It transforms the ordinary into the extraordinary, infusing every bite with a toasty, caramel-like aroma. Trust me, once you try brown butter in your baking, there’s no going back.
We’ll be making two distinct batters – one for the brownie layer and one for the cookie layer – and then layering them artfully in the pan. The result is a marbled masterpiece with distinct textures and flavors that complement each other perfectly. The brownie base will be dense and fudgy, while the cookie topping will be slightly crisp on the edges and wonderfully chewy in the center. The combination is pure bliss.
This recipe might seem a little involved because we’re making two separate components, but each part is straightforward. Take your time, enjoy the process, and the reward will be immense. These brookies are perfect for sharing (or not!) at any occasion, from casual gatherings to special celebrations. They also make fantastic edible gifts. Just be prepared for people to rave about them!
Ingredients:
Cooking Instructions:
Step 1: Crafting the Brown Butter Base
Our journey begin extracts with the star of the show: brown butter. Take the 180g of butter specified for the brownie layer and place it in a light-colored saucepan over medium heat. You’ll want to watch this closely. As the butter melts, it will foam and then small brown specks will start to appear at the bottom of the pan. Swirl the pan occasionally to ensure even heating. You’re looking for a rich, nutty aroma and a golden-brown color. This process typically takes about 5-8 minutes. Once it’s reached that beautiful amber hue and smells wonderfully toasty, immediately remove it from the heat and pour it into a heatproof bowl. This stops the cooking process and prevents it from burning. Let this brown butter cool slightly while you prepare the chocolate.
In a separate heatproof bowl, combine the 320g of chocolate (the kind you’ll melt) and the 180g of butter for the brownie layer. You can melt these gently over a double boiler (a bowl set over a saucepan of simmering water, ensuring the bottom of the bowl doesn’t touch the water) or in the microwave in 30-second intervals, stirring well between each burst. Stir until the chocolate and butter are completely smooth and glossy. Once the brown butter has cooled enough to handle (you don’t want to scramble your eggs!), whisk it into the melted chocolate mixture. The aroma at this stage is already incredible!
Step 2: Building the Fudgy Brownie Batter
Now, let’s build the brownie batter. In a large bowl, whisk together the 180g granulated sugar and 80g brown sugar. Add the 4 eggs, one at a time, whisking well after each addition until thoroughly combined. The mixture should become slightly lighter in color and a bit thicker. Next, stir in the 2g of salt. Gradually fold in the 120g of all-purpose flour and 50g of cocoa powder. Be careful not to overmix at this stage; just mix until no dry streaks of flour remain. Finally, gently fold in the 120g of chocolate chunks, if you’re using them. These will create delightful pockets of melted chocolate within the brownie base. This batter should be thick and luxurious.
Step 3: Preparing the Cookie Dough Layer
For the cookie dough layer, we’ll start by browning the 80g of butter for this component. Follow the same brown butter technique as described in Step 1, melting the butter in a saucepan until it turns a beautiful golden-brown and smells nutty. Pour it into a separate bowl and let it cool slightly. In a medium bowl, cream together the cooled brown butter with 80g of brown sugar and 40g of granulated sugar until light and fluffy. You can use an electric mixer for this or a sturdy whisk and some elbow grease. Then, beat in the 1 egg and 1g of salt until well combined. Finally, gradually stir in the remaining 85g of all-purpose flour until just combined. This cookie dough will be slightly softer than a typical cookie dough, which is exactly what we want for a good brookie layer.
Step 4: Assembling the Brookie Masterpiece
Preheat your oven to 350°F (175°C). Line a 9×13 inch baking pan with parchment paper, leaving some overhang on the sides to help with lifting the brookies out later. This makes cleanup a breeze and ensures even baking. Pour the brownie batter into the prepared pan and spread it evenly to form the base layer. Now, dollop spoonfuls of the cookie dough over the brownie batter. You don’t need to spread it perfectly; in fact, leaving it a little rustic creates beautiful swirls and patches of cookie dough within the brownie. You can gently drag a knife or skewer through the batters to create a marbled effect, but be careful not to overmix and muddy the distinct layers.
Step 5: Baking to Perfection
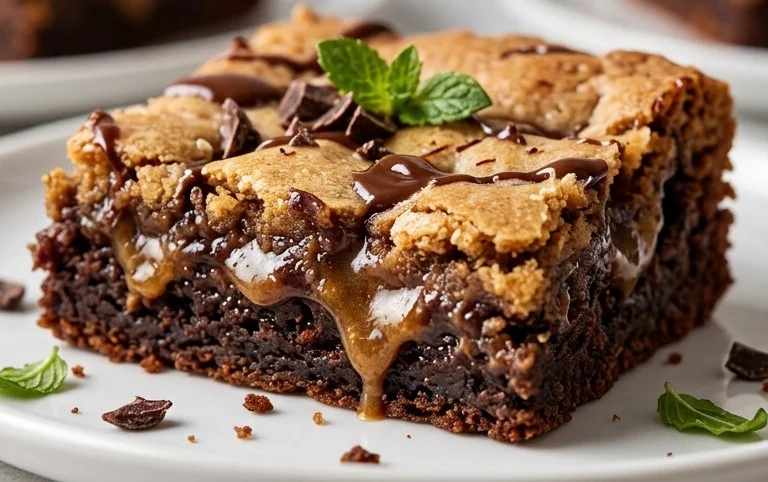
Bake in the preheated oven for 30-40 minutes. The brookies are ready when the edges of the brownie layer are set and slightly puffed, and the cookie layer is golden brown and appears baked but still slightly soft in the center. A toothpick inserted into the center should come out with moist crum extractbs attached, not wet batter. Overbaking will result in dry brookies, so keep a close eye on them, especially towards the end of the baking time. Once baked, remove the pan from the oven and let the brookies cool completely in the pan on a wire rack. This is crucial! They will continue to set as they cool, and slicing them too soon will lead to a messy situation. Once fully cooled, use the parchment paper overhang to lift the entire block out of the pan and cut them into squares or bars. Enjoy your incredible Brown Butter Brookies!
Conclusion:
I hope you’re as excited to dive into these Brown Butter Brookies as I am to have shared this recipe with you! The magic of brown butter truly elevates both the chewy brownie base and the soft chocolate chip cookie topping, creating a symphony of nutty, caramelized flavor in every bite. This recipe is fantastic because it offers the best of both worlds – the rich, fudgy texture of a brownie perfectly contrasted with the familiar comfort of a classic cookie. They are incredibly satisfying and surprisingly easy to make, making them perfect for any occasion, from a weeknight treat to a impressive dessert for guests.
Serving these warm, fresh from the oven, with a scoop of vanilla bean ice cream is pure bliss. For a different twist, consider adding a sprinkle of flaky sea salt on top just before baking to enhance the sweetness and add a delightful crunch. You could also experiment with different chocolate chips – dark chocolate, milk chocolate, or even white chocolate chips would be delicious additions.
Don’t be intimidated by the brown butter step; it’s simpler than you think and the result is so worth it. Give these Brown Butter Brookies a try, and I promise you won’t be disappointed. They’re a guaranteed crowd-pleaser and a personal favorite in my kitchen.
Frequently Asked Questions:
Why is browning the butter important for this recipe?
Browning the butter is the secret weapon for these brookies! It transforms plain butter into a rich, nutty, and deeply caramelized ingredient. This process develops a complex flavor that isn’t present in regular melted butter, adding an incredible depth and warmth to both the brownie and cookie layers, truly making them Brown Butter Brookies.
Can I make the brownie and cookie layers separately and then combine them?
While you could technically bake them separately, the beauty of this recipe lies in the seamless marriage of the two textures and flavors as they bake together. The intended method creates those perfect swirls and ensures they cook evenly, resulting in that iconic brookie experience. It’s definitely worth following the layered approach for the best outcome!
Brown Butter Brookies
A delightful fusion of chewy chocolate chip cookies and fudgy brownies, enhanced with the rich, nutty flavor of brown butter.
Ingredients
-
180 g butter, for brown butter
-
320 g chocolate (60% cacao), for brownie batter
-
120 g all purpose flour, for brownie batter
-
50 g cocoa powder, for brownie batter
-
180 g Granulated Sugar, for brownie batter
-
80 g brown sugar, for brownie batter
-
2 g salt, for brownie batter
-
4 eggs, for brownie batter
-
120 g chocolate chunks (optional), for brownie batter
-
85 g all-purpose flour, for cookie dough
-
80 g butter, softened, for cookie dough
-
80 g brown sugar, for cookie dough
-
40 g granulated sugar, for cookie dough
-
1 g salt, for cookie dough
-
1 egg, for cookie dough
Instructions
-
Step 1
Brown 180g of butter in a saucepan over medium heat, swirling occasionally until nutty and golden brown. Let cool slightly. Preheat oven to 175°C (350°F). -
Step 2
In a heatproof bowl, melt 320g of chocolate. Stir in the browned butter. In a separate bowl, whisk together 120g flour, cocoa powder, 180g granulated sugar, 80g brown sugar, and 2g salt. Add the chocolate mixture and 4 eggs, mixing until just combined. Fold in optional chocolate chunks. -
Step 3
In another bowl, cream 80g softened butter with 80g brown sugar and 40g granulated sugar until light and fluffy. Beat in 1 egg and 1g salt. -
Step 4
Gradually add 85g all-purpose flour to the butter mixture, mixing until just combined to form the cookie dough. -
Step 5
Spread the brownie batter evenly into a greased and floured 9×13 inch baking pan. Dollop spoonfuls of the cookie dough over the brownie batter and gently swirl them together with a knife or toothpick. -
Step 6
Bake for 30-35 minutes, or until a toothpick inserted into the center comes out with moist crumbs. Let cool completely in the pan before cutting into squares.
Important Information
Nutrition Facts (Per Serving)
It is important to consider this information as approximate and not to use it as definitive health advice.
Allergy Information
Please check ingredients for potential allergens and consult a health professional if in doubt.