Cherry Pie Bombs-Irresistible No-Bake Treats
Cherry Pie Bombs are an explosion of pure joy in every bite, and I’m so excited to share this recipe with you! Imagin extracte the comforting aroma of warm, spiced cherries enveloped in a flaky, golden crust, all miniaturized into perfectly portioned delights. It’s no wonder these little wonders have captured hearts everywhere. People adore them for their irresistible blend of sweet and tart cherry filling, balanced by that buttery pastry that just melts in your mouth. What truly sets these Cherry Pie Bombs apart is their delightful format – they’re like all the best parts of a classic cherry pie, concentrated and made incredibly fun to eat. They’re perfect for parties, a sweet treat for the kids, or just a little pick-me-up for yourself. Get ready to fall in love with these sensational Cherry Pie Bombs!

Cherry Pie Bombs
Get ready for a dessert that’s guaranteed to be a showstopper! These Cherry Pie Bombs are a fun and surprisingly simple way to enjoy all the classic flavors of a cherry pie in a bite-sized, utterly irresistible package. Imagin extracte warm, flaky biscuit dough giving way to a sweet, tart cherry filling, all coated in a decadent glaze. They’re perfect for parties, potlucks, or just as a special treat to brighten your day. Forget the fuss of rolling out pie dough; we’re taking a shortcut that delivers maximum flavor and minimal effort. Let’s get started on creating these little explosions of joy!
Ingredients:
Getting Started: Preparing Your Filling and Dough
Before we dive into the frying process, it’s important to have everything prepped and ready to go. This will make the assembly and cooking go much smoother. First, open your can of Grands “Big” biscuits. These are the larger, flakier variety, which will give us a wonderful texture once fried. Gently separate the biscuits, trying not to deflate them too much. You’ll notice they are pre-scored. We want to work with whole biscuits as much as possible for the best bomb structure.
Next, let’s prepare our cherry filling. While store-bought cherry pie filling is a fantastic shortcut, you can certainly use your own homemade filling if you prefer. For this recipe, we’re using a standard 21-ounce can of cherry pie filling. Give it a gentle stir to ensure the cherries and the thick sauce are well combined. We’re going to be spooning this into the biscuit dough, so having it ready is key.
Assembling the Cherry Pie Bombs
This is where the magic starts to happen! We’re going to take each biscuit and carefully create a pocket for our cherry filling. Lay a biscuit flat on a clean, lightly floured surface. You want to gently flatten it a little, but avoid pressing it too thin, as we want it to hold its shape and create a good pocket. Then, using a spoon, carefully place about 1 to 2 tablespoons of the cherry pie filling into the center of the flattened biscuit. Don’t overfill, or it will be difficult to seal and the filling might leak out during frying.
Now, the crucial step: sealing the bomb. Carefully gather the edges of the biscuit dough up around the cherry filling. Pinch and twist the edges together firmly to create a well-senon-alcoholic aled ball. Make sure there are no gaps or holes where the filling can escape. If any dough feels too thin or is tearing, you can gently patch it with a tiny bit of excess dough from another biscuit, pressing it in to ensure a good seal. The goal is a nice, round ball with no seams showing. Repeat this process for all the biscuits.
Frying Your Cherry Pie Bombs to Golden Perfection
Now it’s time to bring on the heat! You’ll need a deep pot or Dutch oven for frying. Pour in enough vegetable oil to come about 3-4 inches up the sides of the pot. We want enough oil to fully submerge the pie bombs so they fry evenly. Heat the oil over medium-high heat until it reaches approximately 350°F (175°C). Using a thermometer is highly recommended here to ensure the oil is at the correct temperature. If the oil is too hot, the outside will burn before the inside cooks. If it’s not hot enough, the bombs will absorb too much oil and become greasy.
Once your oil is at the right temperature, carefully and gently place 3-4 cherry pie bombs into the hot oil. Do not overcrowd the pot, as this will lower the oil temperature and result in uneven cooking. Use a slotted spoon or spider strainer to gently lower them into the oil to prevent splattering. Let them fry for about 2-3 minutes per side, or until they are beautifully golden brown and puffed up. You’ll see them bobbing in the oil. Use your slotted spoon to gently turn them over so they cook evenly on all sides.
Draining and Glazing for Ultimate Deliciousness
As soon as your Cherry Pie Bombs are a perfect golden brown, carefully remove them from the hot oil using your slotted spoon or spider strainer. Let any excess oil drip back into the pot for a moment. Immediately transfer them to a plate lined with paper towels to absorb any remaining grease. This step is important for achieving that desirable crisp exterior without a greasy bite. Allow them to cool slightly for a few minutes before moving on to the best part – the glaze!
To make the glaze, in a medium bowl, whisk together the powdered sugar, milk, and light corn syrup. The corn syrup adds a lovely sheen and helps the glaze set just right. Start with ¼ cup of milk and add a tiny bit more, a teaspoon at a time, until you reach your desired drizzling consistency. You want it thick enough to coat the bombs but thin enough to drizzle easily. Once the bombs have cooled enough to handle but are still warm, you can generously drizzle the glaze over them. You can also dip the tops of the bombs into the glaze for a more robust coating. Serve them warm and watch them disappear!
Conclusion:
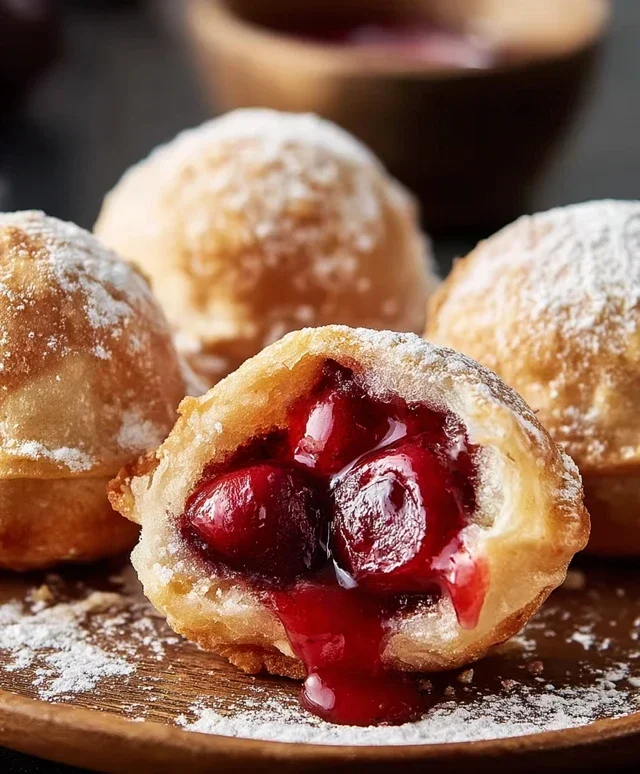
And there you have it – the irresistible Cherry Pie Bombs! I truly hope you’ve enjoyed learning how to make these delightful little treats. They’re a fantastic way to enjoy all the classic flavors of cherry pie in a fun, bite-sized package. The buttery, flaky pastry encasing the sweet and slightly tart cherry filling is simply divine, making them perfect for any occasion. Whether you’re looking for a crowd-pleasing dessert for a party, a special weekend baking project, or just a delicious way to satisfy a sweet craving, these Cherry Pie Bombs are sure to be a hit. They’re surprisingly easy to assemble, and the payoff is immense! I encourage you to give this recipe a try; you won’t regret it.
These little bombs are incredibly versatile. Serve them warm with a scoop of vanilla ice cream for a truly decadent experience, or dust them with powdered sugar for a simpler, yet elegant finish. They also pair wonderfully with a dollop of whipped cream or even a drizzle of caramel sauce.
Feel free to get creative with variations! While the classic cherry filling is divine, you could experiment with other berry fillings like blueberry or raspberry, or even a mixed berry blend. For an added layer of flavor, consider adding a touch of almond extract to your filling or a pinch of cinnamon. You could even add a crum extractble topping for extra texture.
Frequently Asked Questions about Cherry Pie Bombs:
Can I make the cherry filling ahead of time?
Absolutely! You can prepare the cherry filling a day or two in advance and store it in an airtight container in the refrigerator. This can save you time when you’re ready to assemble your Cherry Pie Bombs.
How should I store leftover Cherry Pie Bombs?
Store any leftover Cherry Pie Bombs in an airtight container at room temperature for up to two days, or in the refrigerator for up to four days. Reheat them gently in a low oven or toaster oven to revive their flaky pastry.
Can I use frozen cherries for this recipe?
Yes, you can definitely use frozen cherries. Make sure to thaw them completely and drain off any excess liquid before incorporating them into the filling to avoid a watery result.
Cherry Pie Bombs
A delightful and easy treat featuring the classic flavors of cherry pie in a fried biscuit form.
Ingredients
-
Vegetable oil, for frying
-
16.3 ounces Grands “Big” biscuits, flaky
-
21 ounces cherry pie filling
-
2 cups powdered sugar
-
¼ cup milk
-
1 tablespoon light corn syrup
Instructions
-
Step 1
Open the Grands biscuits and separate them. Flatten each biscuit slightly. -
Step 2
Spoon about 2 tablespoons of cherry pie filling into the center of each flattened biscuit. -
Step 3
Carefully bring the edges of the biscuit up and pinch them together to seal the filling inside, forming a ball or “bomb” shape. -
Step 4
Heat vegetable oil in a deep skillet or pot over medium heat. Carefully place the cherry pie bombs into the hot oil, frying in batches if necessary, until golden brown on all sides. -
Step 5
Remove the fried bombs with a slotted spoon and place them on a paper towel-lined plate to drain excess oil. -
Step 6
In a small bowl, whisk together powdered sugar, milk, and light corn syrup until smooth to create a glaze. Add more milk a teaspoon at a time if the glaze is too thick. -
Step 7
Drizzle the glaze over the warm cherry pie bombs.
Important Information
Nutrition Facts (Per Serving)
It is important to consider this information as approximate and not to use it as definitive health advice.
Allergy Information
Please check ingredients for potential allergens and consult a health professional if in doubt.