Chocolate Dipped Fruit Cones-Easy Dessert Recipe
Chocolate Dipped Fruit Filled Cones are the ultimate way to elevate a simple dessert into a showstopping treat. Imagin extracte the satisfying crunch of a perfectly baked cone, giving way to a burst of vibrant, fresh fruit, all encased in a luscious layer of rich, decadent chocolate. It’s a combination that’s simply irresistible, a delightful dance of textures and flavors that appeals to every palate. These delightful creations aren’t just a dessert; they’re an experience. They’re perfect for parties, a special afternoon pick-me-up, or even a romantic gesture. What makes Chocolate Dipped Fruit Filled Cones so special is their versatility; you can customize the fruit fillings to your heart’s content, and the contrasting elements – the crisp cone, the juicy fruit, and the smooth chocolate – create a truly memorable bite. Get ready to fall in love with these charming and delicious Chocolate Dipped Fruit Filled Cones!
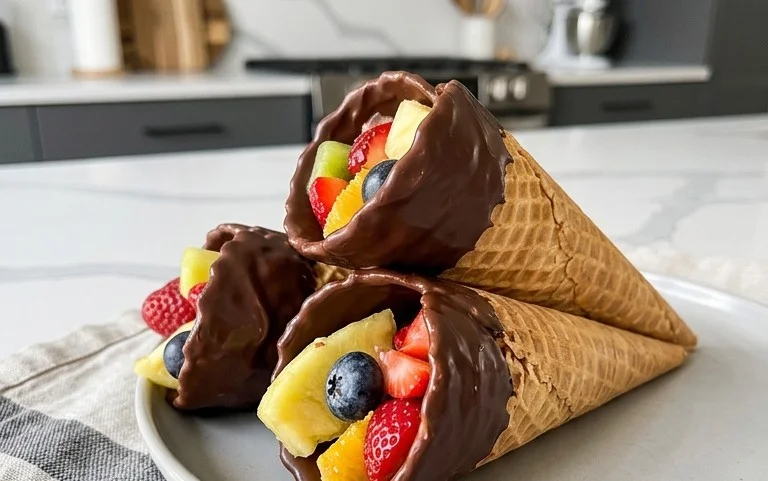
Chocolate Dipped Fruit Filled Cones
There’s something truly magical about a sweet treat that combines the crunch of a waffle cone with the burst of fresh fruit and the luxurious smoothness of chocolate. These Chocolate Dipped Fruit Filled Cones are exactly that kind of magic – a delightful indulgence that feels special enough for a celebration but is simple enough to whip up for a weeknight treat. Imagin extracte biting into a crisp, golden waffle cone, filled with a medley of vibrant, juicy fruits, and then getting that satisfying crack of rich chocolate. It’s a symphony of textures and flavors that will have everyone reaching for seconds.
These cones are incredibly versatile. You can customize the fruit filling based on what’s in season or what your personal favorites are. Berries, chopped stone fruits, or even a tropical mix all work beautifully. The key is to have the fruit cut into bite-sized pieces so they nestle perfectly within the cone. And the chocolate dipping? It’s the crowning glory, adding a touch of elegance and an extra layer of decadence. Let’s get started on creating these delightful treats!
Ingredients:
Preparing the Fruit Filling
The first step to creating our amazing cones is to get the fruit filling ready. This is where we’ll add a touch of sweetness and brightness to our fresh produce. In a medium bowl, combine the finely chopped strawberries, whole blueberries, and raspberries. If your berries are particularly tart, you might want to add the tablespoon of granulated sugar. The sugar will help to draw out some of the natural juices from the fruit and create a slightly syrupy base. This also helps to sweeten the overall filling. A tiny squeeze of lemon juice can also work wonders, even if your fruit is sweet. It acts as a flavor enhancer, making the fruit flavors pop and preventing the filling from tasting flat. Gently stir everything together. Be careful not to mash the raspberries too much; we want to keep some of their lovely shape. Let this mixture sit for about 10-15 minutes while you prepare the chocolate. This allows the flavors to meld and the sugar (if used) to start dissolving.
Melting the Chocolate
Now for the decadent part: the chocolate! We need our chocolate to be perfectly smooth and ready for dipping. The easiest and most reliable way to melt chocolate for dipping is using a double boiler method or a microwave.
Double Boiler Method:
If you’re using a double boiler, fill the bottom pot with about an inch or two of water and bring it to a gentle simmer over medium-low heat. Make sure the water doesn’t touch the bottom of the upper bowl. Place your chocolate chips and the coconut oil (or shortening) in the upper bowl. Stir occasionally until the chocolate is completely melted and smooth. The coconut oil or shortening is a secret weapon here. It helps the chocolate melt more easily and gives it a beautiful sheen, as well as a cleaner snap when it sets.
Microwave Method:
If you’re microwaving, place the chocolate chips and coconut oil in a microwave-safe bowl. Heat on 50% power for 30-second intervals, stirring well after each interval. Continue this until the chocolate is mostly melted, then stir until it’s completely smooth. Be patient! Overheating chocolate can cause it to seize up, and that’s something we definitely want to avoid.
Once the chocolate is melted and smooth, remove it from the heat (or microwave) and let it cool slightly. You want it to be warm enough to dip easily but not so hot that it melts the waffle cones or the fruit filling.
Assembling the Cones
This is where the fun really begin extracts! We’re going to bring all our elements together to create these stunning treats. Take your waffle cones and carefully spoon the prepared fruit mixture into the bottom of each cone. Don’t overfill them; you want to leave some space at the top for the chocolate coating. If you find your fruit mixture is a bit too juicy, you can lightly drain off any excess liquid before filling the cones. This will help prevent the chocolate from getting soggy.
The Chocolate Dip
Now for the pièce de résistance: dipping these beauties in chocolate! Hold a filled cone by the rim and carefully dip the top portion into the slightly cooled melted chocolate. You can dip it about halfway up the cone, or as much as you like. Rotate the cone gently to ensure an even coating. Let any excess chocolate drip back into the bowl. If you want a thicker coating, you can dip it a second time, but make sure the first layer has set a bit, or is at least mostly opaque.
Placing and Decorating
Once dipped, carefully place the chocolate-covered cones upright. The best way to do this is to stand them up in a tall glass or a vase. This allows the excess chocolate to drip down the sides a bit, creating a lovely effect, and helps them set without touching anything. If you’re adding any optional toppings like chopped nuts, sprinkles, or shredded coconut, now is the time to sprinkle them onto the wet chocolate. Work quickly before the chocolate starts to set. If you want to add a drizzle of white chocolate, melt some white chocolate chips separately (using the same double boiler or microwave method) and then use a spoon or a piping bag to create thin lines over the set chocolate.
Setting and Serving
Once your cones are dipped and decorated, it’s time to let them set. You can leave them at room temperature if your kitchen isn’t too warm, but for the best and quickest results, I like to pop them in the refrigerator for about 15-20 minutes. This ensures the chocolate is firm and ready to be enjoyed. When you’re ready to serve, carefully remove them from their glasses. These Chocolate Dipped Fruit Filled Cones are best enjoyed the same day they are made, as the waffle cones can lose their crispness over time. Get ready to hear some happy sighs of delight as everyone discovers the wonderful combination of crunchy cone, juicy fruit, and rich chocolate!

Conclusion:
And there you have it – your guide to creating these delightful Chocolate Dipped Fruit Filled Cones! I truly believe this recipe is a winner because it strikes the perfect balance between elegant presentation and simple, satisfying flavors. The crisp waffle cone, the luscious fruit filling, and the rich chocolate coating all come together to create a truly memorable treat. They’re not just visually stunning but incredibly delicious, making them perfect for impressing guests or simply indulgin extractg yourself.
These cones are wonderfully versatile. They make a fantastic dessert for parties, a fun afternoon snack for kids (and adults!), or even a thoughtful homemade gift. Consider serving them alongside a scoop of vanilla ice cream for an extra decadent experience, or present them on a charming platter for a sophisticated touch. For variations, don’t be afraid to get creative! Experiment with different fruit fillings like a tangy raspberry compote, a tropical mango-passionfruit blend, or a classic strawberry cream. You can also swap out the chocolate for white chocolate or even a swirl of both for added visual appeal. I wholeheartedly encourage you to give these Chocolate Dipped Fruit Filled Cones a try. You’ll be amazed at how easy they are to make and how much joy they bring!
Frequently Asked Questions:
Can I make these cones ahead of time?
Yes, you can! Once the chocolate has fully set, store the cones in an airtight container at room temperature for up to 2-3 days. If your filling is particularly moist or your kitchen is very warm, refrigerating them is an option, but be aware that condensation can sometimes affect the crispness of the cone. It’s best to add a very thin layer of chocolate inside the cone before adding the filling to act as a barrier.
What’s the best way to store leftover fruit filling?
Leftover fruit filling can be stored in an airtight container in the refrigerator for up to 5 days. It’s perfect for topping yogurt, pancakes, or even enjoying on its own!
Are there any nut-free options for this recipe?
Absolutely! Ensure you use nut-free chocolate chips and avoid adding any nuts to your fruit filling or as a garnish. Always check the packagin extractg of your ingredients to confirm they are free from allergens.
Chocolate Dipped Fruit Filled Cones
Deliciously sweet and fruity cones dipped in rich chocolate.
Ingredients
-
1 cup heavy cream
-
1/4 cup granulated sugar
-
1 teaspoon vanilla extract
-
8 ounces fresh strawberries, hulled and quartered
-
8 ounces fresh raspberries
-
8 ounces bittersweet chocolate, chopped
-
1 tablespoon coconut oil
Instructions
-
Step 1
In a medium bowl, whip the heavy cream and granulated sugar until stiff peaks form. -
Step 2
Gently fold in the vanilla extract, strawberries, and raspberries. -
Step 3
Line a baking sheet with parchment paper. -
Step 4
In a heatproof bowl set over a saucepan of simmering water, melt the chopped bittersweet chocolate and coconut oil, stirring until smooth. -
Step 5
Spoon the fruit mixture into the bottom of waffle cones, then dip the tops into the melted chocolate. -
Step 6
Place the dipped cones on the prepared baking sheet and chill in the refrigerator for at least 15 minutes, or until the chocolate is set.
Important Information
Nutrition Facts (Per Serving)
It is important to consider this information as approximate and not to use it as definitive health advice.
Allergy Information
Please check ingredients for potential allergens and consult a health professional if in doubt.