Easy Homemade Fruit Curd Recipe-Delicious & Bright
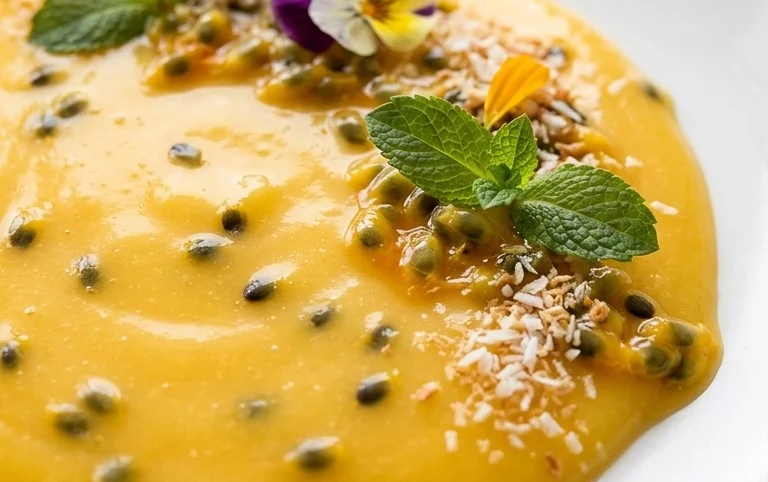
Fruit curd is one of those culinary treasures that transforms simple ingredients into pure magic. There’s something undeniably delightful about its silky smooth texture and vibrant, tangy flavor that just sings of sunshine and pure comfort. It’s the kind of treat that makes you feel sophisticated and indulged, even when you’ve whipped it up in your own kitchen. What makes fruit curd so incredibly special? It’s the perfect balance – intensely fruity, rich with egg yolks, and subtly sweet, offering a complex taste that’s both refreshing and satisfying. Whether you’re spreading it generously on warm toast, dolloping it onto your favorite dessert, or simply savoring it by the spoonful, this versatile delight is guaranteed to brighten your day. Get ready to discover how easy it is to create this sunshine-in-a-jar for yourself!
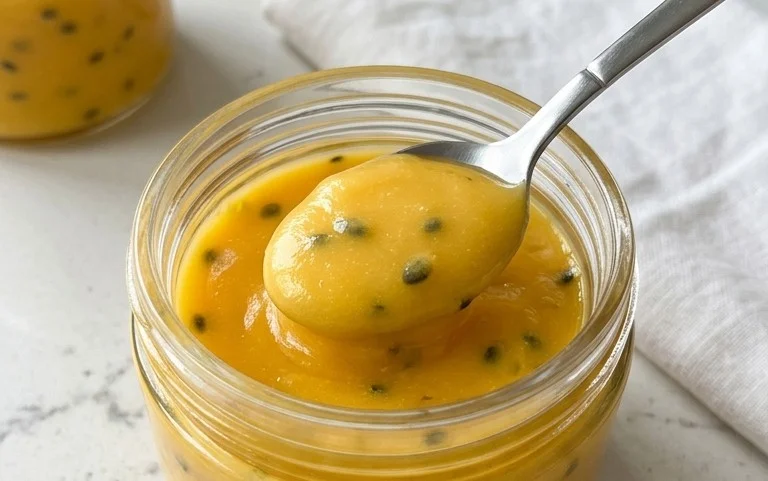
Fruit Curd
Fruit curd is a delightful and versatile culinary creation that brings a burst of sunshine to any dessert. Its smooth, tangy, and intensely fruity flavor profile makes it a perfect filling for tarts, a topping for scones and cakes, or simply a delicious spoonful enjoyed straight from the jar. While it might seem intimidating, making fruit curd at home is surprisingly straightforward, yielding a superior taste and texture compared to store-bought varieties. The key lies in understanding the simple science behind its creation and using good quality ingredients. I’ve found that the best curds are made with fresh, ripe fruit, ensuring a vibrant flavor that truly shines through. Today, we’ll be focusing on a classic lemon curd, but the principles can be applied to a wide array of fruits like lime, passionfruit, orange, or even berries.
Ingredients:
Cooking Instructions
The magic of fruit curd happens on the stovetop, where gentle heat coaxes simple ingredients into a luxuriously smooth and thickened delight. It’s a process that requires a little patience and attention, but the reward is absolutely worth it. We’ll be using a double boiler method, which provides indirect, gentle heat. This is crucial to prevent the eggs from scrambling and ensures a silky-smooth consistency. If you don’t have a dedicated double boiler, a heatproof bowl set over a saucepan of simmering water works just as well. The water should be gently simmering, not boiling vigorously, as excessive steam can also affect the curd.
Phase 1: Combining the Base
The first step is to bring together the foundational elements of our curd. In a medium, heatproof bowl that fits snugly over a saucepan, whisk together the 4 egg yolks and the 1 whole egg. You want to break up the yolks and whites thoroughly, ensuring they are well combined. Next, gradually whisk in the granulated sugar. Continue whisking until the mixture is pnon-alcoholic ale yellow and slightly thickened. This process helps to dissolve the sugar, which is important for preventing a gritty texture in the finished curd. Don’t rush this; a minute or two of good whisking here makes a difference.
Phase 2: Infusing with Citrus
Now, it’s time to introduce the star of the show: the lemon juice and zest. Add the fresh lemon juice and the finely grated lemon zest to the egg and sugar mixture. Whisk everything together until it’s uniformly combined. The zest is where much of the intense lemon aroma and flavor resides, so don’t be shy about it! Using a microplane will ensure you only get the colored part of the peel, avoiding the bitter white pith. This mixture will be quite liquidy at this stage, but don’t worry; it will transform beautifully.
Phase 3: Gentle Thickening
Place the heatproof bowl over a saucepan filled with about 1 to 2 inches of simmering water. Ensure the bottom of the bowl does not touch the water. Begin extract whisking the mixture constantly. This constant motion is vital to prevent the eggs from cooking unevenly and scrambling. As you whisk, you’ll notice the mixture gradually starting to thicken. This process can take anywhere from 10 to 20 minutes, depending on the heat of your stove and the size of your saucepan. Keep whisking, making sure to scrape the bottom and sides of the bowl to ensure even cooking. You are looking for the curd to be thick enough to coat the back of a spoon. If you run your finger through the curd on the back of the spoon, the line should hold its shape without immediately running back together. This is the sign of perfect consistency.
Phase 4: Enriching with Butter
Once the curd has reached the desired thickness, remove the bowl from the heat. Now, it’s time to add the unsalted butter. Add the small cubes of cold butter, one or two at a time, whisking continuously until each piece is fully incorporated before adding the next. The butter is what gives the curd its rich, velvety texture and beautiful sheen. As the butter melts and emulsifies into the warm curd, it will become even smoother and glossier. Continue whisking until all the butter has been added and the curd is completely smooth and glossy. The warmth of the curd will melt the butter without the need for further direct heat.
Phase 5: Straining and Chilling
For the absolute silkiest curd, I highly recommend straining it. Pass the finished curd through a fine-mesh sieve into a clean bowl or jar. This will remove any small bits of cooked egg that might have formed, ensuring a luxuriously smooth texture. Press gently with a spatula to extract all the goodness. Once strained, cover the surface of the curd directly with plastic wrap. This “skin” prevents a skin from forming on top as it cools. Allow the curd to cool at room temperature for about 30 minutes to an hour, then refrigerate it for at least 2-3 hours, or until completely chilled and set. The chilling process is essential for the curd to firm up properly. It will continue to thicken as it cools.
Your homemade fruit curd is now ready to be enjoyed! It’s perfect on toast, scones, pancakes, or as a filling for cakes and tarts. Store it in an airtight container in the refrigerator for up to a week. Enjoy the bright, tangy goodness!
Conclusion:
And there you have it! This fruit curd recipe is truly a revelation, offering a delightful balance of sweet and tart that’s both vibrant and incredibly versatile. Its smooth, silky texture and intense fruity flavor make it a star ingredient in so many desserts. Whether you’re looking to elevate a simple scone, add a burst of sunshine to your breakfast, or create an impressive layered cake, this fruit curd is your secret weapon. Don’t be intimidated by the process; it’s surprisingly straightforward and the results are incredibly rewarding. I encourage you to give it a try and discover your new favorite homemade treat!
Serving suggestions are endless! Dollop it onto yogurt or ice cream, spread it on toast or pancakes, use it as a filling for tarts, pastries, or cupcakes, or even swirl it into whipped cream for a sophisticated dessert. For variations, feel free to experiment with different fruits – lemon and lime are classics, but raspberry, passionfruit, or even a mix of berries can yield stunning results. Adjust the sugar and citrus to your personal preference for the perfect flavor profile.
FAQs:
Why is my fruit curd lumpy?
Lumps can occur if the egg yolks are cooked too quickly or unevenly. It’s crucial to cook the curd over a low heat, stirring constantly with a whisk. Alternatively, if lumps do form, you can strain the finished curd through a fine-mesh sieve for a perfectly smooth consistency.
How long does fruit curd last?
When stored properly in an airtight container in the refrigerator, fruit curd typically lasts for about 1 to 2 weeks. Ensure it’s always covered to prevent a skin from forming and to maintain its freshness.
Fruit Curd
A smooth and tangy fruit curd, perfect for tarts, cakes, or simply enjoyed with a spoon.
Ingredients
-
1 cup fruit puree (e.g., raspberry, lemon, passion fruit)
-
1/2 cup unsalted butter, cut into pieces
-
3/4 cup granulated sugar
-
4 large eggs
-
1 tablespoon cornstarch
-
1/4 teaspoon salt
Instructions
-
Step 1
In a medium saucepan, whisk together the fruit puree, sugar, cornstarch, and salt until well combined. -
Step 2
Add the eggs to the saucepan and whisk thoroughly until smooth. -
Step 3
Place the saucepan over medium-low heat. Cook, stirring constantly with a whisk or spatula, scraping the bottom and sides, until the mixture thickens enough to coat the back of a spoon (about 8-10 minutes). Do not boil. -
Step 4
Remove the saucepan from the heat. Whisk in the butter, a few pieces at a time, until completely melted and incorporated into the curd. -
Step 5
Strain the curd through a fine-mesh sieve into a clean bowl or jar to remove any cooked egg bits and ensure a silky smooth texture. -
Step 6
Press plastic wrap directly onto the surface of the curd to prevent a skin from forming. Refrigerate for at least 2 hours, or until completely chilled and set.
Important Information
Nutrition Facts (Per Serving)
It is important to consider this information as approximate and not to use it as definitive health advice.
Allergy Information
Please check ingredients for potential allergens and consult a health professional if in doubt.