Lemon Blueberry Truffles- Easy No-Bake Treat
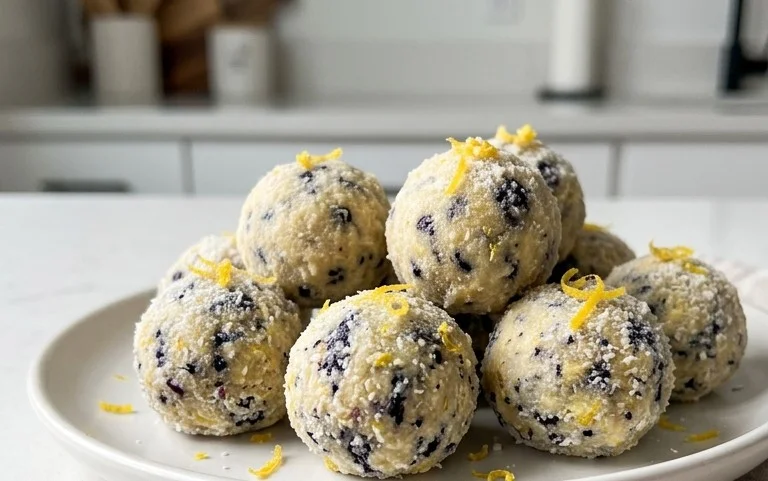
Lemon Blueberry Truffles are an absolute revelation, a bite-sized burst of sunshine and sweet berry goodness that I simply cannot get enough of! If you’re anything like me, you adore those moments when a simple treat can completely elevate your mood. That’s precisely what these delightful Lemon Blueberry Truffles do. They’re perfect for a little pick-me-up, a thoughtful homemade gift, or as an elegant finish to any meal. What makes these particular Lemon Blueberry Truffles so special is the irresistible dance between the bright, zesty tang of fresh lemon and the juicy, slightly tart pop of ripe blueberries, all swirled into a luxuriously smooth, melt-in-your-mouth truffle. They’re incredibly easy to make, proving that gourmet-level indulgence doesn’t require hours in the kitchen. Get ready to fall in love!
Lemon Blueberry Truffles
Get ready to experience a burst of sunshine and sweet, tart goodness with these delightful Lemon Blueberry Truffles! These no-bake wonders are incredibly easy to make and are perfect for a healthy treat, a special occasion, or just because you deserve something delicious. They’re packed with wholesome ingredients, offering a wonderful combination of textures and vibrant flavors that will have you reaching for more. We’re going to create two distinct layers for these truffles: a chewy, fruity base and a creamy, zesty frosting that perfectly complements the bright blueberry and lemon notes. Let’s dive in and whip up some magic in the kitchen!
Ingredients:
Crafting the Fruity Base
First things first, let’s prepare the foundation of our delightful truffles. This part is all about blending wholesome ingredients into a wonderfully chewy and flavorful base.
1. Prepare the Dates: Begin extract by pitting the dates if they aren’t already pitted. For the best results, especially if your dates feel a little dry, you can soak them in warm water for about 10-15 minutes. Once softened, drain them thoroughly. This step is crucial for achieving a sticky consistency that will bind all the ingredients together perfectly.
2. Process the Dry Ingredients: In a food processor, add the walnuts, gluten-free rolled oats, shredded coconut, and chia seeds. Pulse these ingredients a few times until they are finely chopped but not yet a powder. We’re looking for a nice texture here, not dust. This will provide a lovely chew and structure to our truffle base.
3. Combine and Blend: Add the pitted dates and the wild blueberries to the food processor with the processed dry ingredients. Now, add the juice of one lemon. Process everything until the mixture starts to clump together and forms a sticky dough. It should hold its shape when you squeeze a small amount between your fingers. If it seems too dry and crum extractbly, you can add a tiny splash more lemon juice or even a teaspoon of water, but be cautious not to make it too wet. The goal is a pliable, cohesive mixture that’s easy to roll.
Forming the Truffles
Now that we have our delicious base mixture, it’s time to get our hands a little sticky and form these into perfect little spheres.
4. Roll the Truffles: Take about a tablespoon of the mixture at a time and roll it between your palms to form small balls, about 1-inch in diameter. If the mixture is sticking to your hands, you can lightly dampen your hands with water or lemon juice. Place the rolled truffles onto a parchment-lined baking sheet or plate. Once all the mixture is rolled, place the tray in the freezer for about 15-20 minutes. This chilling step will help them firm up, making the next step much easier.
Creating the Luscious Lemon Frosting
While our truffle bases are chilling, let’s whip up the creamy, dreamy frosting that will elevate these treats to a whole new level of deliciousness.
5. Prepare and Blend the Frosting: Drain the soaked cashews thoroughly. Add the drained cashews to a high-powered blender or food processor. Add the melted and cooled coconut oil, raw honey, vanilla extract, and the juice of the second lemon. Begin extract blending. You will likely need to scrape down the sides of the blender a few times. Gradually add the warm water, 1 tablespoon at a time, while blending, until you achieve a smooth, thick, and creamy frosting consistency. It should be thick enough to coat the back of a spoon but still pourable. Be patient with this step; a good blend is key to a luxurious frosting.
Finishing Touches and Serving
The final steps are where everything comes together for a truly spectacular treat.
6. Coat the Truffles: Once the truffle bases have firmed up in the freezer, remove them from the tray. Using two forks or a small spoon, carefully dip each truffle into the lemon frosting, ensuring it is fully coated. Allow any excess frosting to drip back into the bowl. Place the coated truffles back onto the parchment-lined tray.
7. Chill to Set: Once all the truffles are coated, place the tray back into the refrigerator for at least 1-2 hours, or until the frosting has set completely. This allows the coconut oil to firm up and the flavors to meld beautifully. For an even firmer truffle, you can also pop them in the freezer for about 30 minutes before serving.
These Lemon Blueberry Truffles are best stored in an airtight container in the refrigerator. They will keep for up to a week. Enjoy the vibrant, refreshing taste of these homemade delights! They are a perfect guilt-free indulgence that’s sure to impress.
Conclusion:
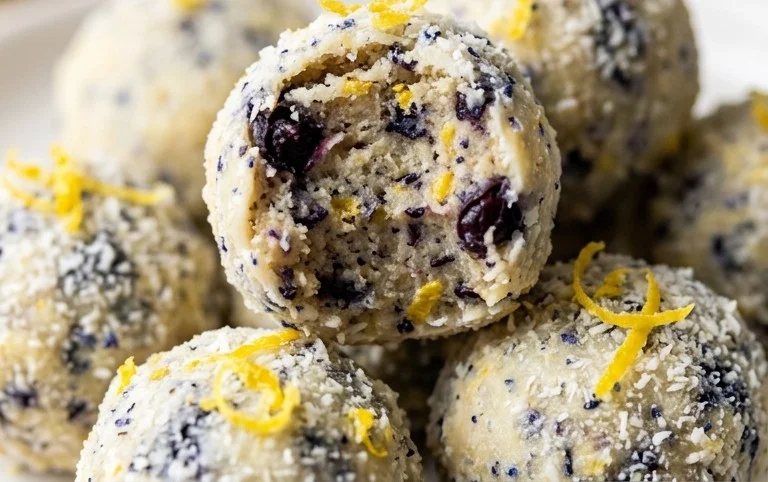
These Lemon Blueberry Truffles are a true delight, offering a perfect balance of bright citrus and sweet, juicy berries, all enrobed in a decadent chocolate shell. They’re surprisingly simple to make, making them an ideal treat for both seasoned bakers and enthusiastic begin extractners. The combination of zesty lemon and plump blueberries creates a flavor profile that is both refreshing and indulgent, perfect for any occasion. Whether you’re looking for a sophisticated dessert to impress guests, a thoughtful homemade gift, or simply a moment of pure culinary pleasure for yourself, these truffles deliver.
They are fantastic served chilled, nestled in mini cupcake liners, or even scattered atop a cheesecake or yogurt parfait. For variations, consider adding a touch of lavender to the white chocolate coating for an extra floral note, or incorporating finely chopped toasted almonds into the blueberry mixture for added texture. Don’t be afraid to experiment! I wholeheartedly encourage you to give these Lemon Blueberry Truffles a try. You’ll be amazed at how quickly they disappear!
Frequently Asked Questions:
Can I make these Lemon Blueberry Truffles ahead of time?
Absolutely! These truffles store beautifully. Once fully set, you can keep them in an airtight container in the refrigerator for up to a week. They’re even better after a day or two, allowing the flavors to meld.
What kind of chocolate should I use for coating?
For the best results, I recommend using good quality white chocolate for melting. You can also use milk or dark chocolate if you prefer, but white chocolate complements the lemon and blueberry flavors wonderfully. Ensure your chocolate is tempered correctly for a smooth, glossy finish that snaps when you bite into it.
My truffle centers are too soft to coat. What went wrong?
This usually happens if the truffle centers haven’t chilled long enough. Make sure they are completely firm before attempting to roll and coat them. You can also try chilling them again if they start to soften during the coating process.
Lemon Blueberry Truffles
Decadent and healthy no-bake truffles featuring the bright flavors of lemon and blueberry, made with wholesome ingredients.
Ingredients
-
1 cup wild blueberries
-
1 cup walnuts
-
1 cup dates
-
3 tbsp gluten-free rolled oats
-
2 tbsp shredded coconut
-
1 tbsp chia seeds
-
1 lemon, juiced
-
1 cup cashews
-
½ cup coconut oil, melted and cooled
-
3 tbsp raw honey
-
1 tsp vanilla extract
-
2-3 tbsp warm water
Instructions
-
Step 1
In a food processor, combine walnuts, dates, gluten-free rolled oats, shredded coconut, and chia seeds. Process until a coarse meal forms. -
Step 2
Add the wild blueberries and lemon juice to the food processor. Process until the mixture starts to clump together. If it’s too dry, add another teaspoon of lemon juice. -
Step 3
Roll the mixture into small balls, about 1 inch in diameter. Place on a baking sheet lined with parchment paper and refrigerate for at least 30 minutes to firm up. -
Step 4
While the truffles are chilling, prepare the frosting. In a high-speed blender, combine the soaked cashews, melted coconut oil, raw honey, vanilla extract, and lemon juice. -
Step 5
Blend until completely smooth and creamy, adding warm water 1 tablespoon at a time as needed to achieve a pourable consistency. -
Step 6
Dip each chilled truffle into the cashew frosting, ensuring it’s fully coated. You can use a fork or a toothpick for this. Place back on the parchment-lined baking sheet. -
Step 7
Drizzle any remaining frosting over the truffles for extra flair. Refrigerate for at least another 1 hour, or until the frosting is set.
Important Information
Nutrition Facts (Per Serving)
It is important to consider this information as approximate and not to use it as definitive health advice.
Allergy Information
Please check ingredients for potential allergens and consult a health professional if in doubt.